
Escape Pod’s Texture Research
Before any research at what common escape pod textures are used, my initial thoughts include metal exterior for the majority and then glass for any windows used. The metal may further be textured to include colours and markings that make up the overall design of the escape pod. I used Pinterest and modelling sites to explore what specific textures people use on certain parts of the pod. It was clear that a grey metallic texture was commonly used for the main exterior of the pod. An orange/gold rusted texture is also used to combat the plain grey and allow colour to certain areas that need to stand out. Any lights shining are either blue or red to indicate attention and the overall look is very worn down due to the rough space atmosphere. These kind of materials were seen on most examples that I came across.

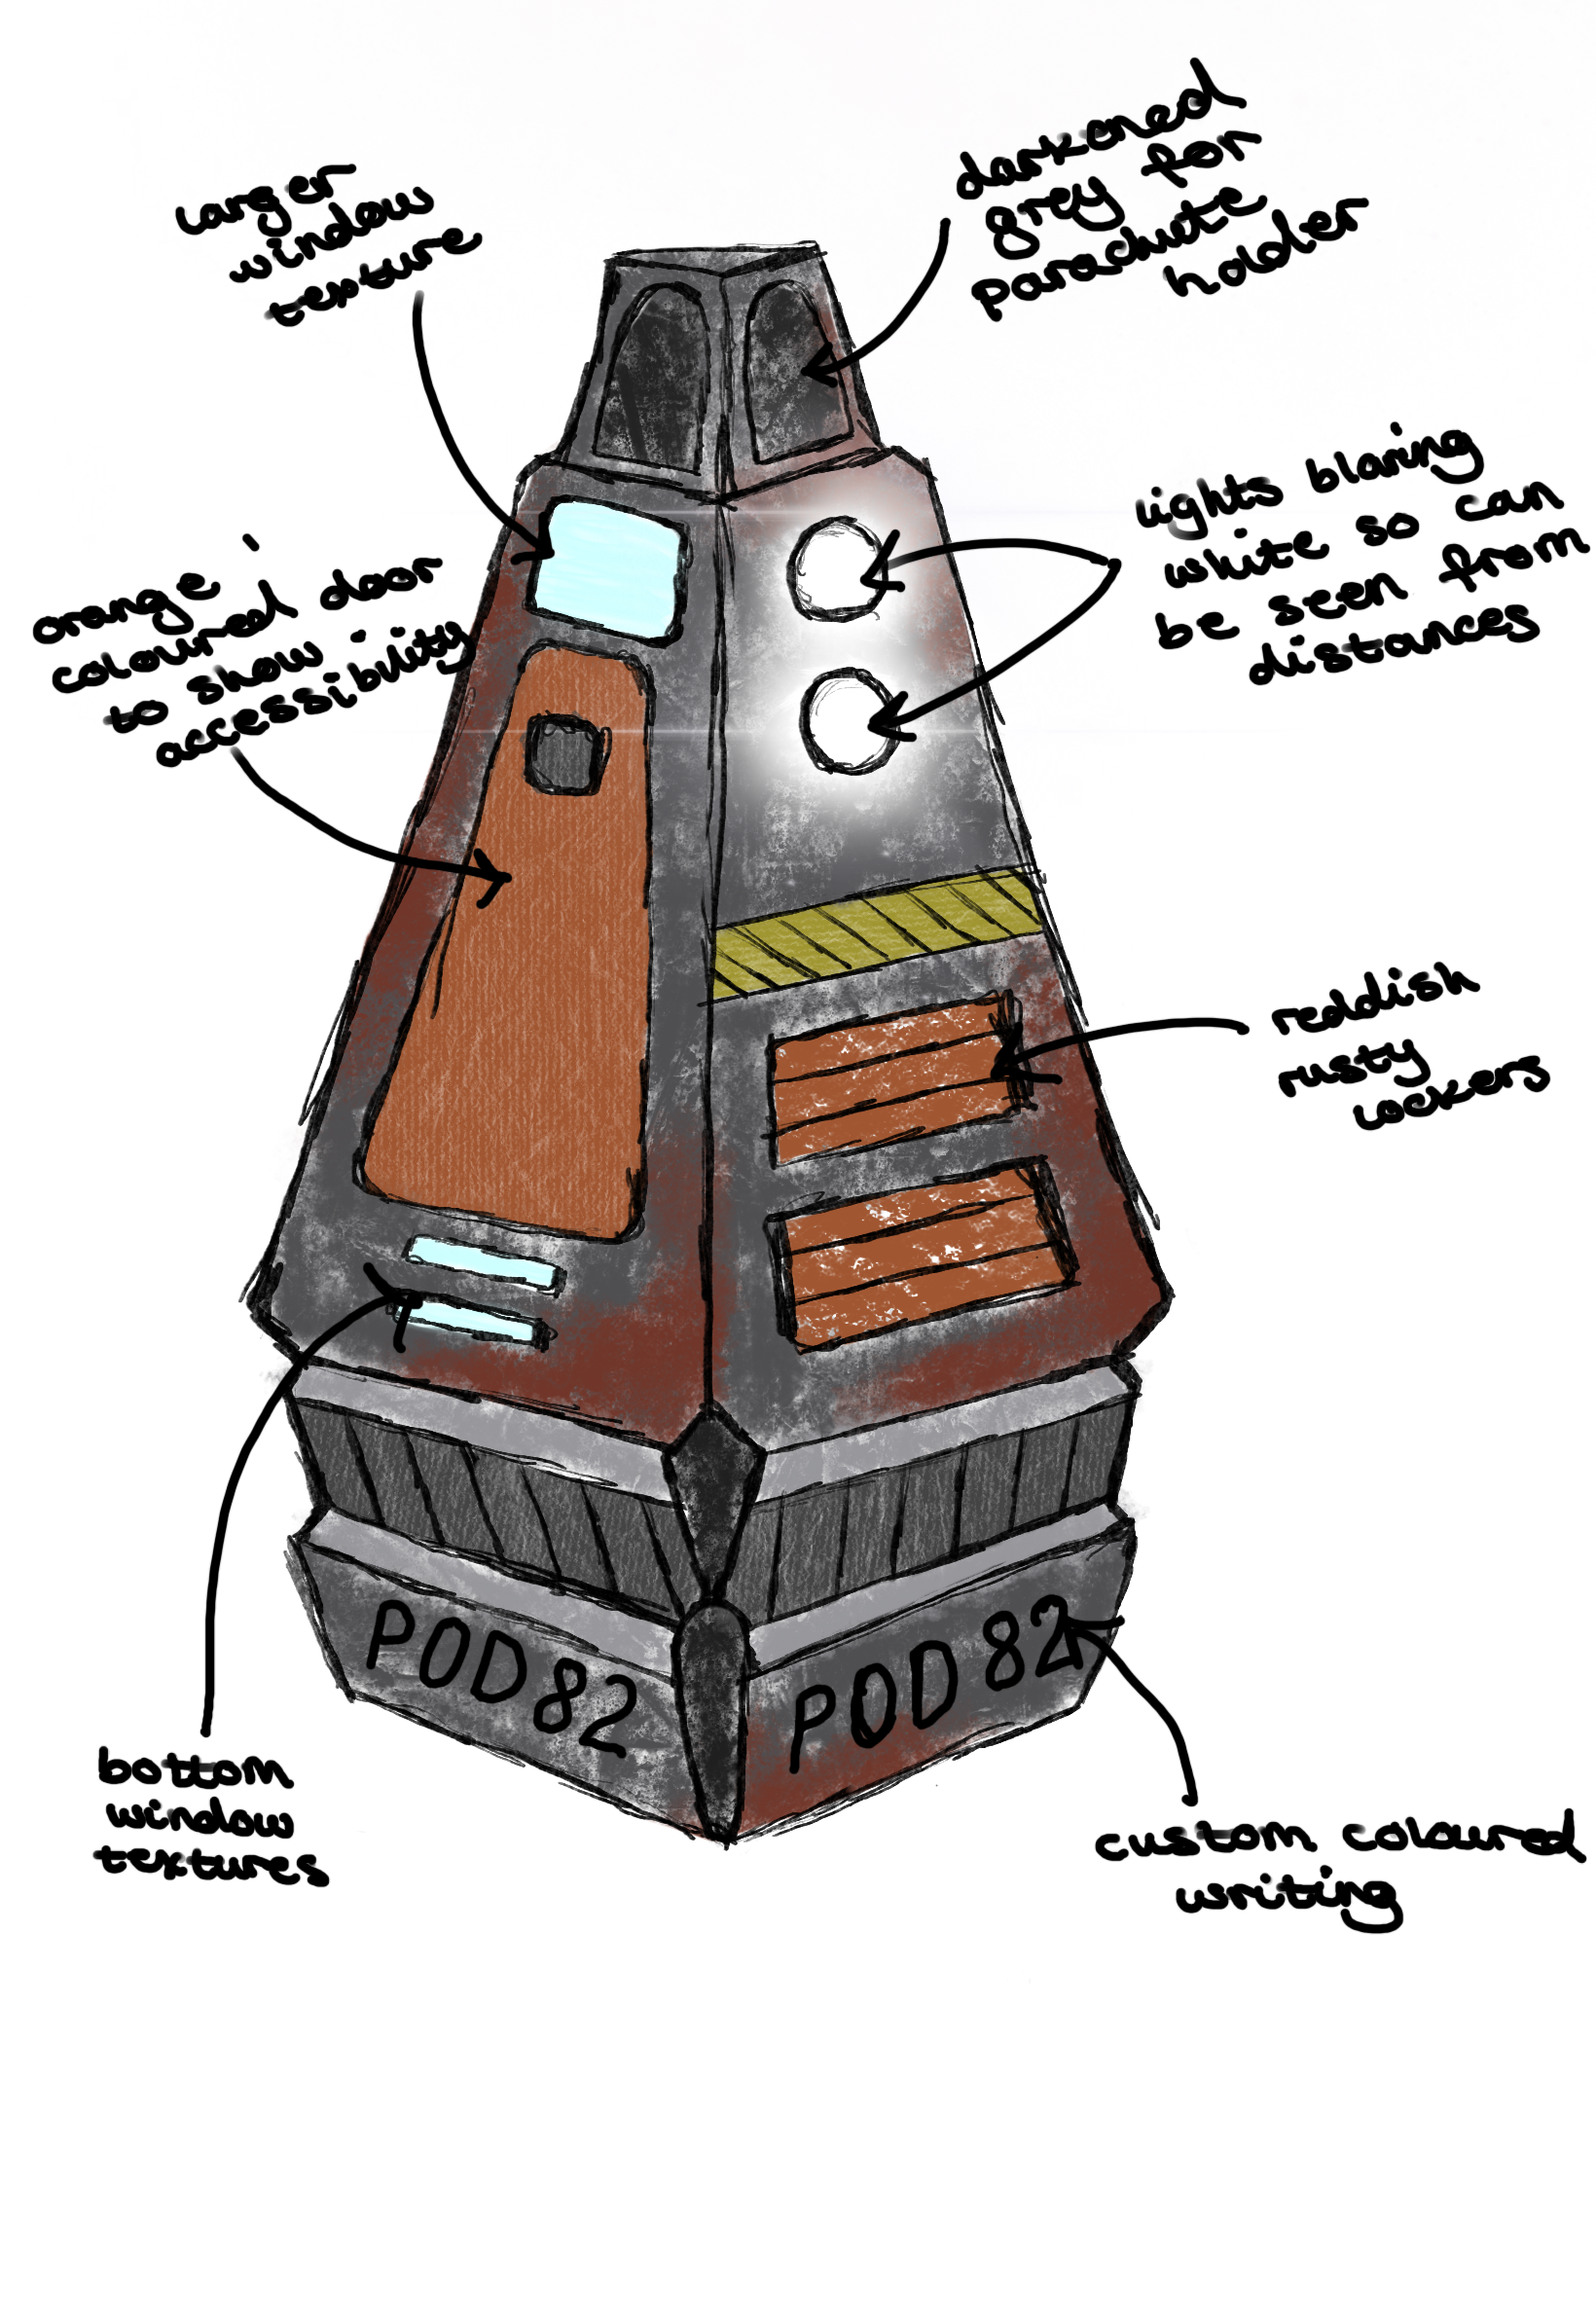
Looking at my model, I aimed to follow suit and use the grey base layer that seems to be a theme among the pods. I also want to use a deep red/orange tone to use on some areas of my pod such as the storage lockers and certain parts of the door so that people know that these areas are accessible. The windows will obviously be a glass texture and the lights will be a bright white so that they will be able to be seen from far distances when in space. I want to further my pod and continue the rusty-like look in order to emphasise that it has been travelling high speed and encourages the space theme. Below you can see where I want each texture to be.
UV Unwrapping Process in Maya
A UV is essentially a shortened way of saying Texture Co-ordinates; they define each point on a 3D model’s surface which corresponds to a particular pixel in a 2D texture. Once a model has been unwrapped, the UV map can then be altered to add detail and colour. This method is key to allow us to add our custom textures onto our 3-Dimensional model more efficiently. The first stage to completing this is to prepare the mesh for unwrapping.
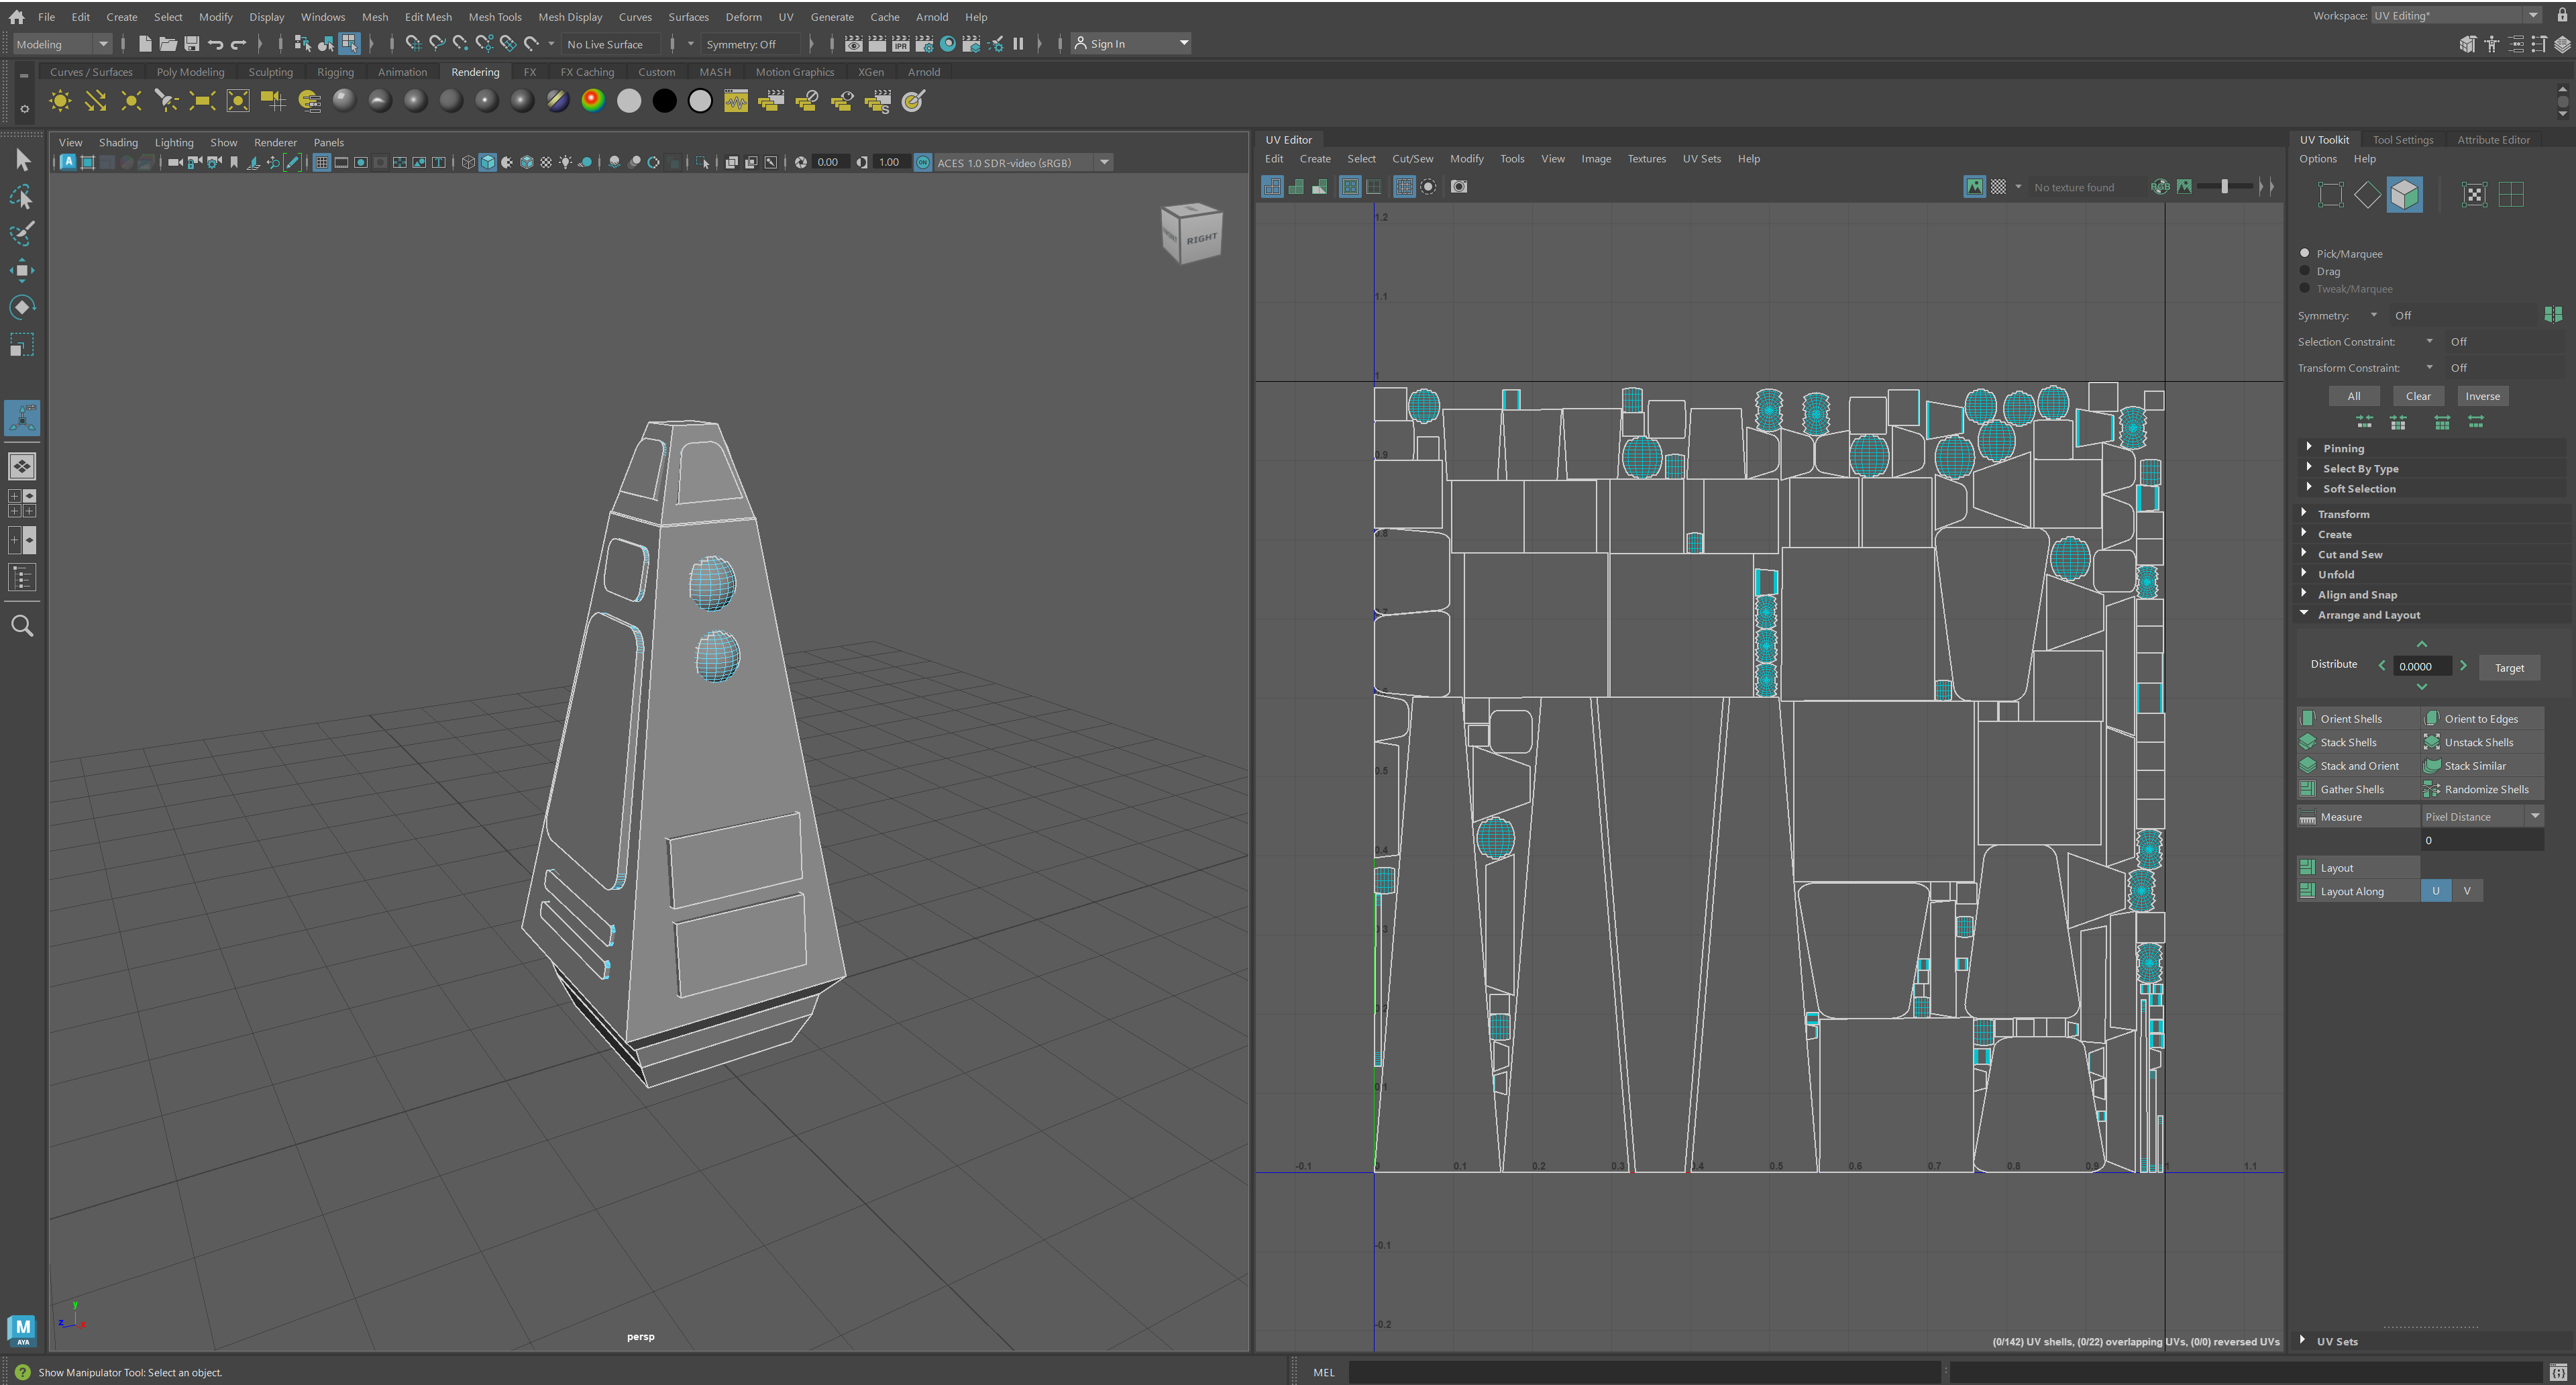
I chose to automatically unwrap each separate face of my model in Maya and ensure that each edge and surface was flattened to provide a less complicated mesh to work with. This will ensure that every face is laid out and isn’t a complicated mess. Maya thankfully had the option to ensure this was all done properly for me and my mesh was completed in the UV editor. Below you can see a screenshot from Maya exploring this unwrapped UV.
Using Textures and Adding to Model in Substance Painter
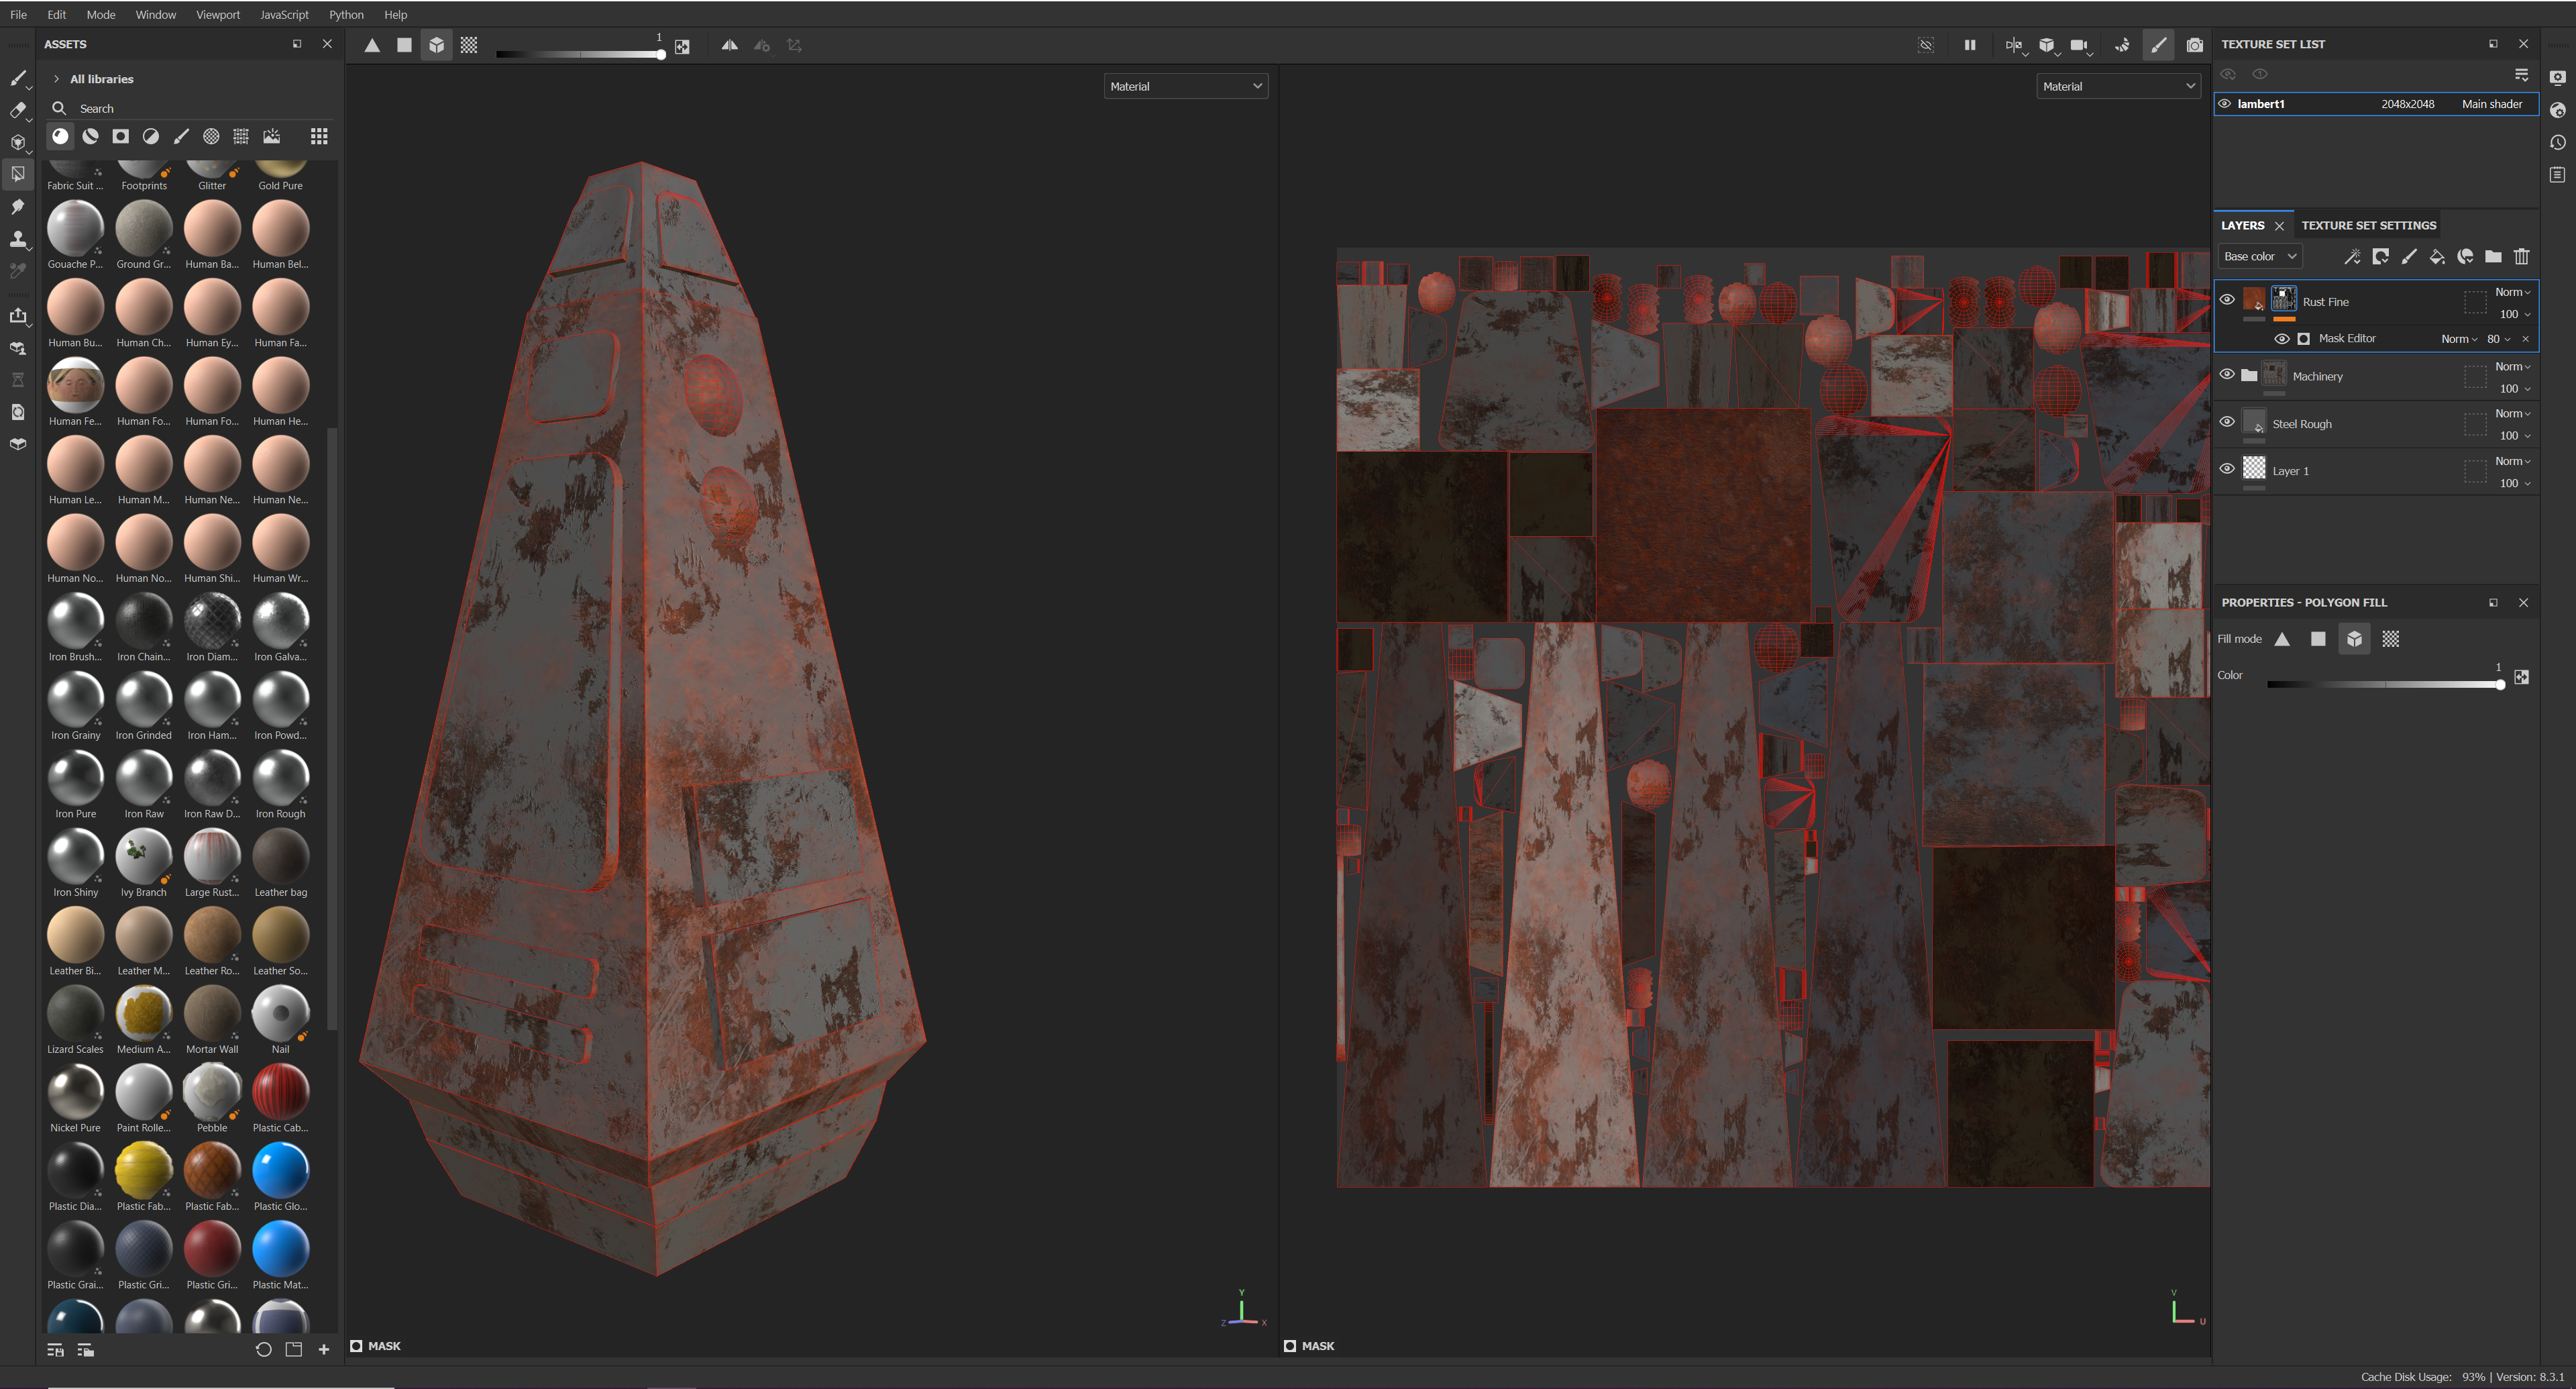
Now it was time to import the previous UV into Substance Painter to add textures to the required parts of the model. Initially, I needed to plan the order of my layers so that I can start from the bottom and work my way up slowly. I decided on using a simple light grey fill colour for the bottom of my base which correlates to the sketched plan above. I was then able to add a mechanical smart material over the top and mask this to the previous grey. This allowed for the grey colour and mechanical material to combine and complete the base of my escape pod. I also added a rusted mask on top of these layers to emphasise the aging of the model and how it has been tumbling through space.
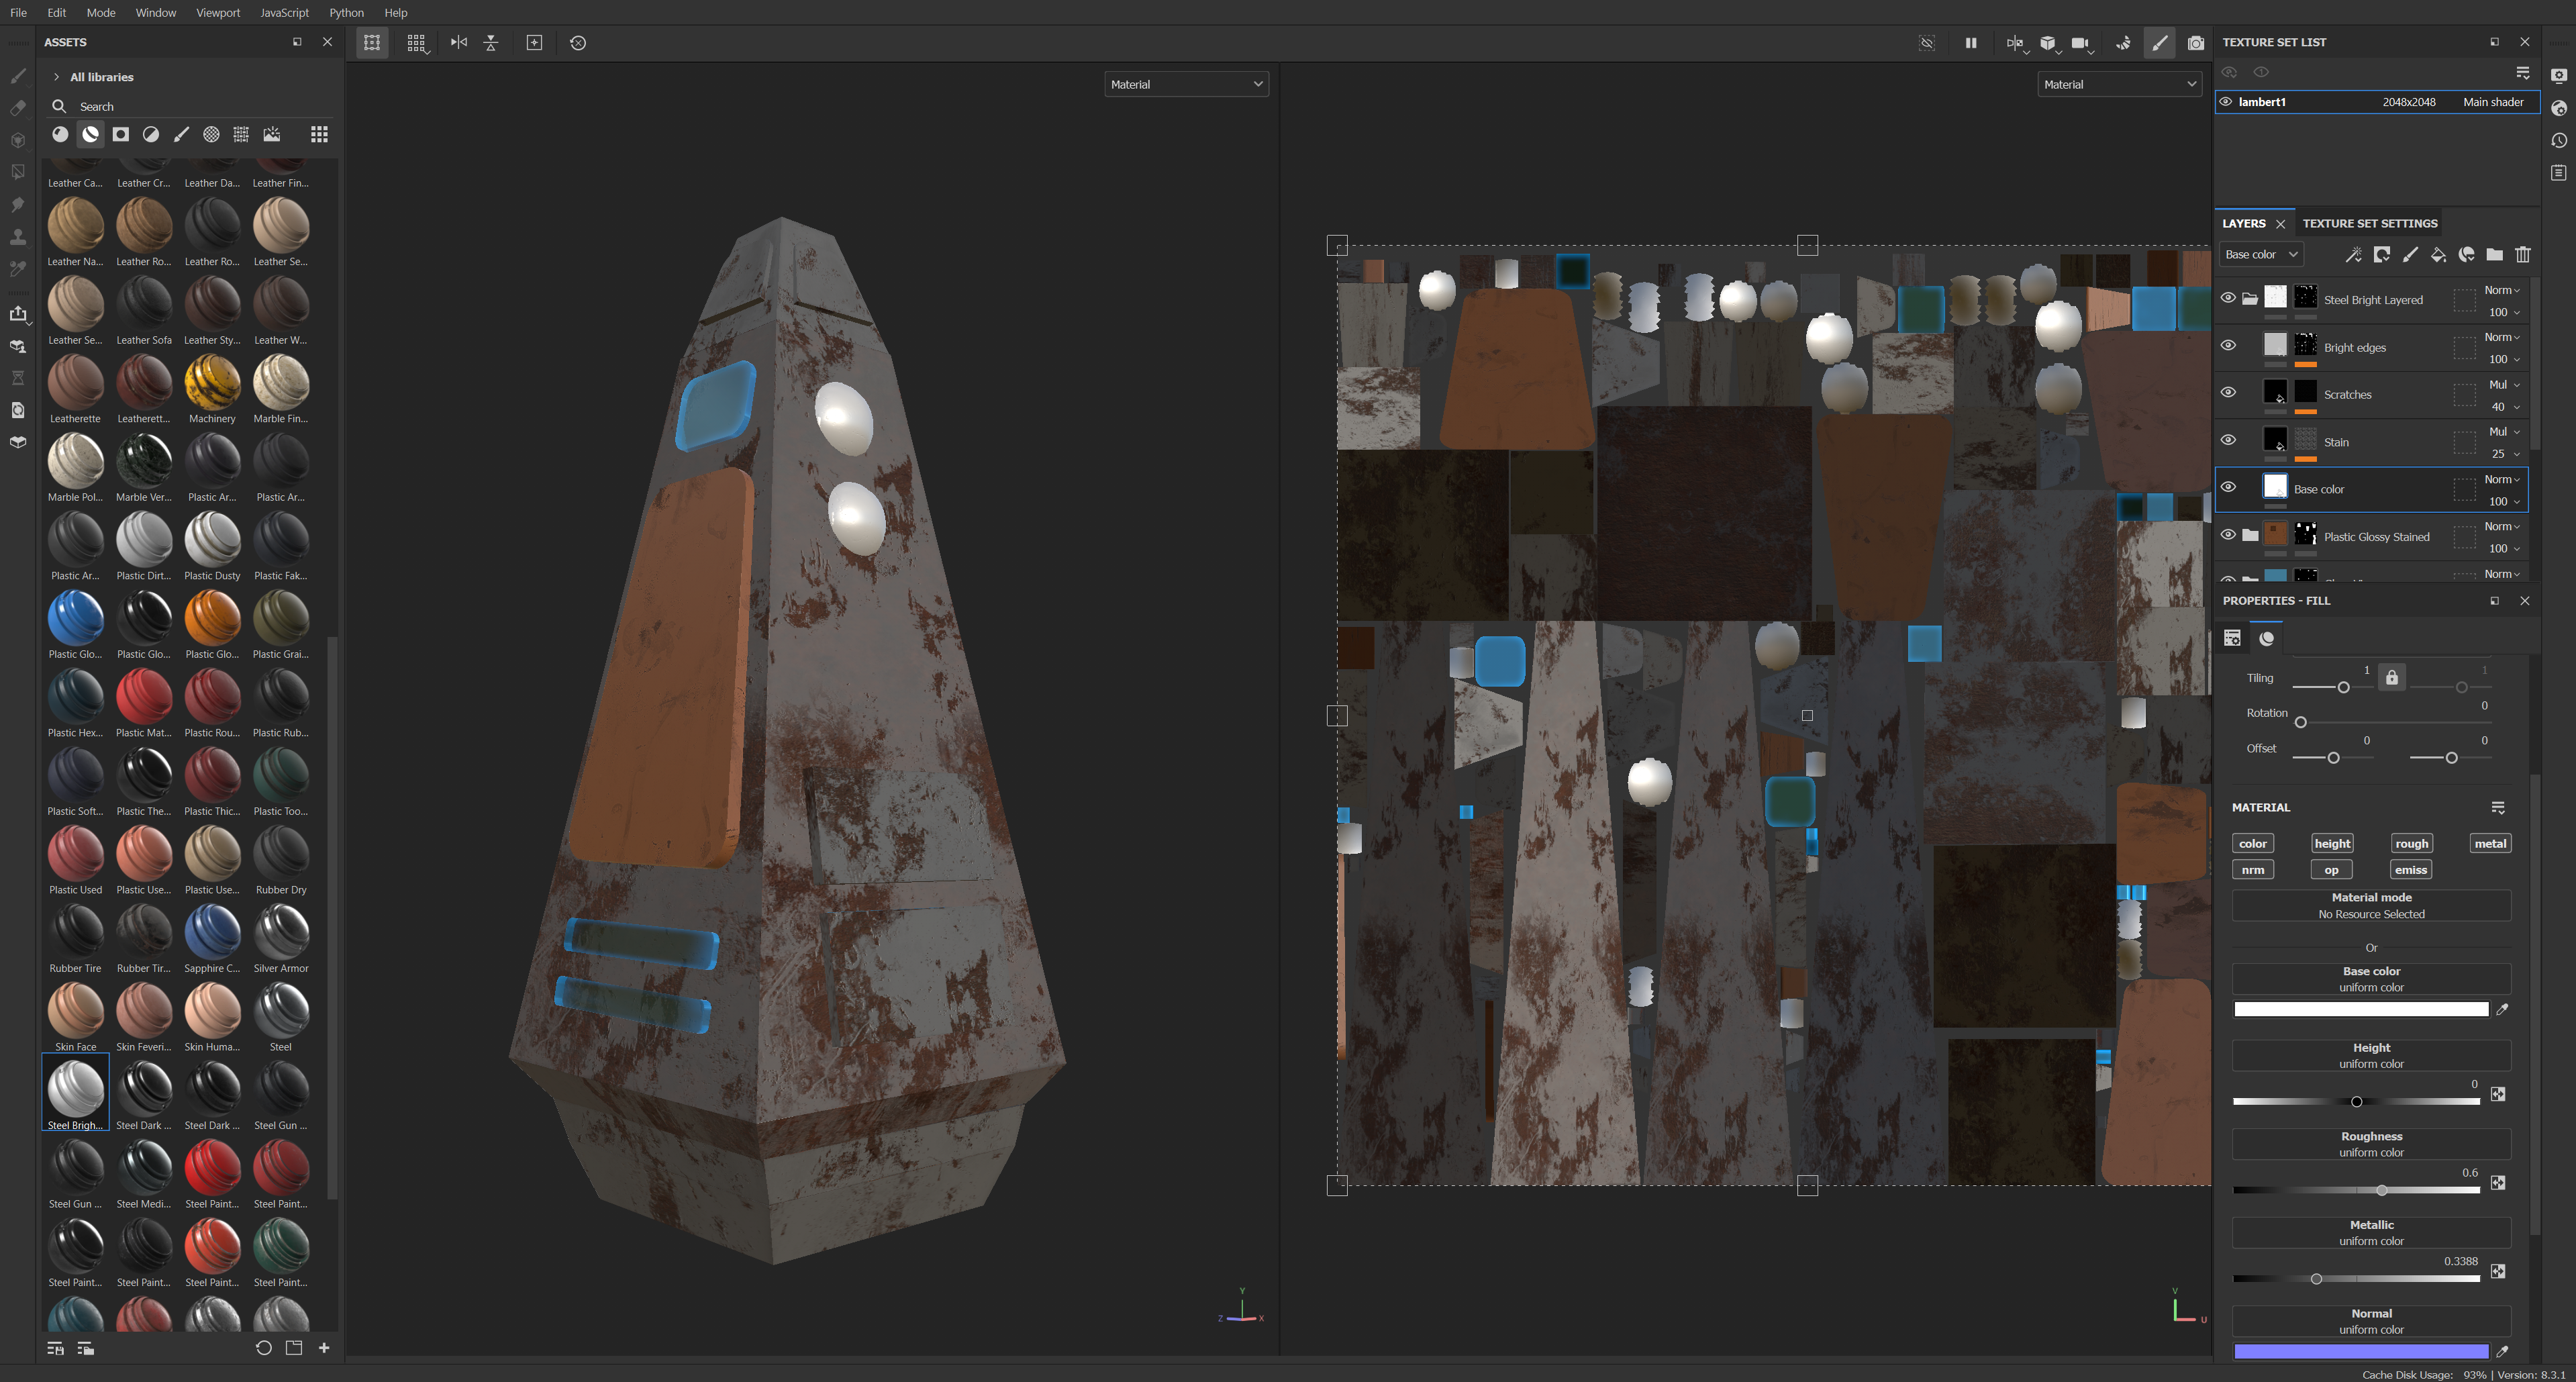
I then moved onto the specific details and raised areas of the model created in Maya. Looking back at my original plan, I needed to use a glass texture in order to create windows for the user of the pod to see their surroundings. I created a mask from this and added it to the three areas where my windows would be. This then corresponds itself onto the UV mesh on the right hand side. I followed this method – experimenting with different materials and textures – until I was satisfied with how my model looked. As you can see, I did not add certain areas of my plan such as the text specified on the bottom of the pod. I felt as though this wouldn’t have been very visible in comparison and also found the process overly complex. If I wanted to further my model and complete it to a higher standard, these elements would have been added.
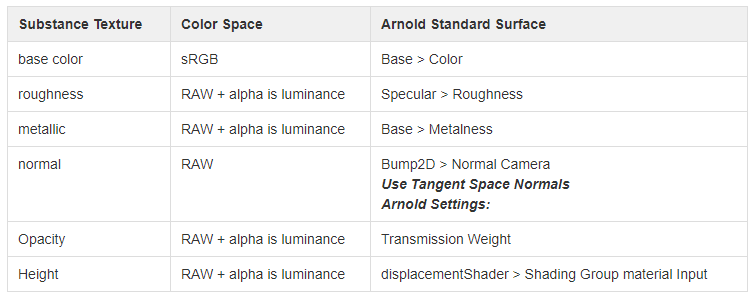
After I was happy with the model’s paint, I had to transport the now customised UV maps back into Maya and onto my model. Substance Painter renders different versions of the UV which then has to be correctly lined up with the right settings in Maya. An example of this was that my base colour map from Substance Painter needed to be imported on the colour of my Arnold surface in Maya. I found an import guide on the official Substance Painter website which helped me match the corresponding textures from each software program. It was key that each of the settings were correct in order for my textures to be shown correctly in Maya.
Once this was all set up and I added some simple area and direct lighting features, I could finally produce some professional renders of the finished 3D model. I am very happy with how this turned out considering the obstacles that were encountered from learning two difficult software’s as well as creating this piece.

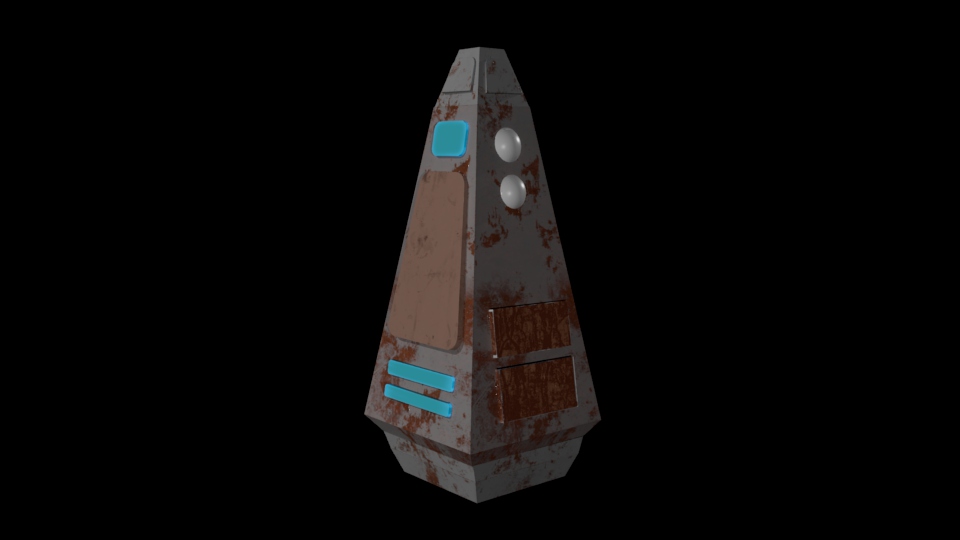
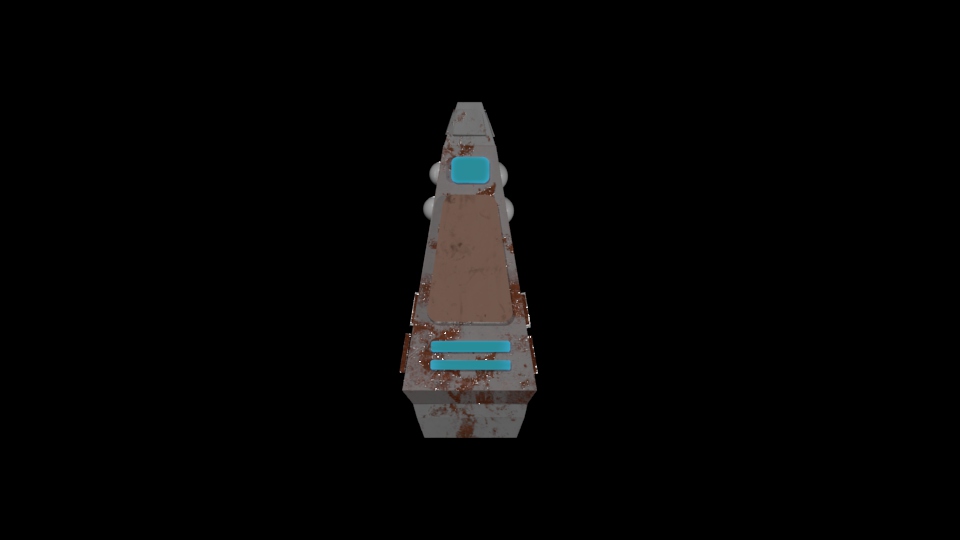
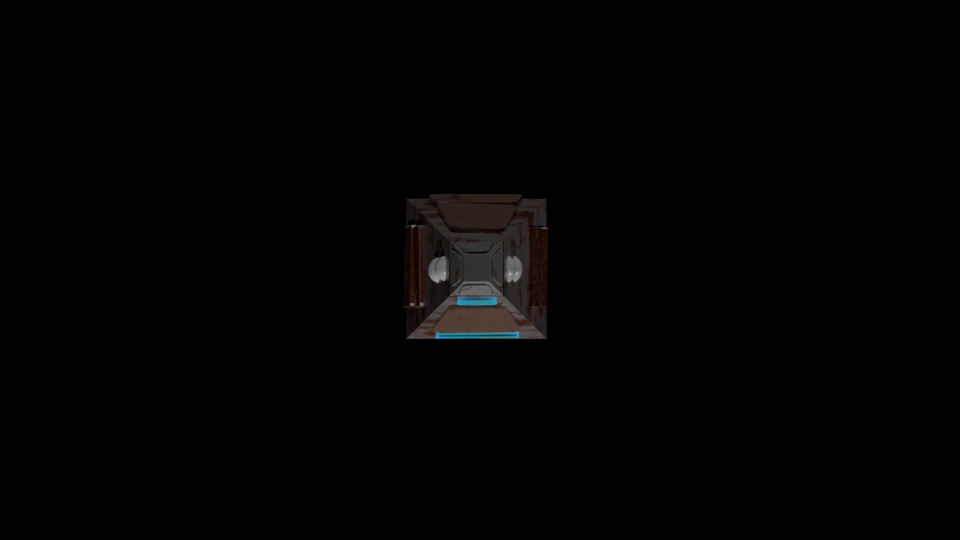
Final Rendered Images
Here are my four final rendered images of my space-based escape pod which has been relevantly textured in Adobe Substance Painter and exported back into Autodesk Maya. The renders below consist of three orthographic projections (the top, bottom and side) and one perspective shot.

References
substance3d.adobe.com, 2023. Substance guide to rendering in Arnold for Maya. [Online]
Available at: https://substance3d.adobe.com/tutorials/courses/Substance-guide-to-Rendering-in-Arnold
[Accessed 03 May 2023].
Vanga, G., n.d. Escape pod textures. [Online]
Available at: https://in.pinterest.com/gouthamsvanga/escape-pod-textures/
[Accessed 22 April 2023].