
Secondary Escape Pod Research
“An escape capsule is design for crew among a spacecraft to escape said craft while it is subjected to extreme conditions. The occupant remains encapsulated and protected until the external environment is suitable for exposure.” (en.wikipedia.org, n.d.). The brief at hand is to design a 3-Dimensional model of a space-based escape pod to demonstrate modelling skills. It is essential to ensure that the escape pod follows suit during the modelling process and can allow for an individual to survive an ejection.
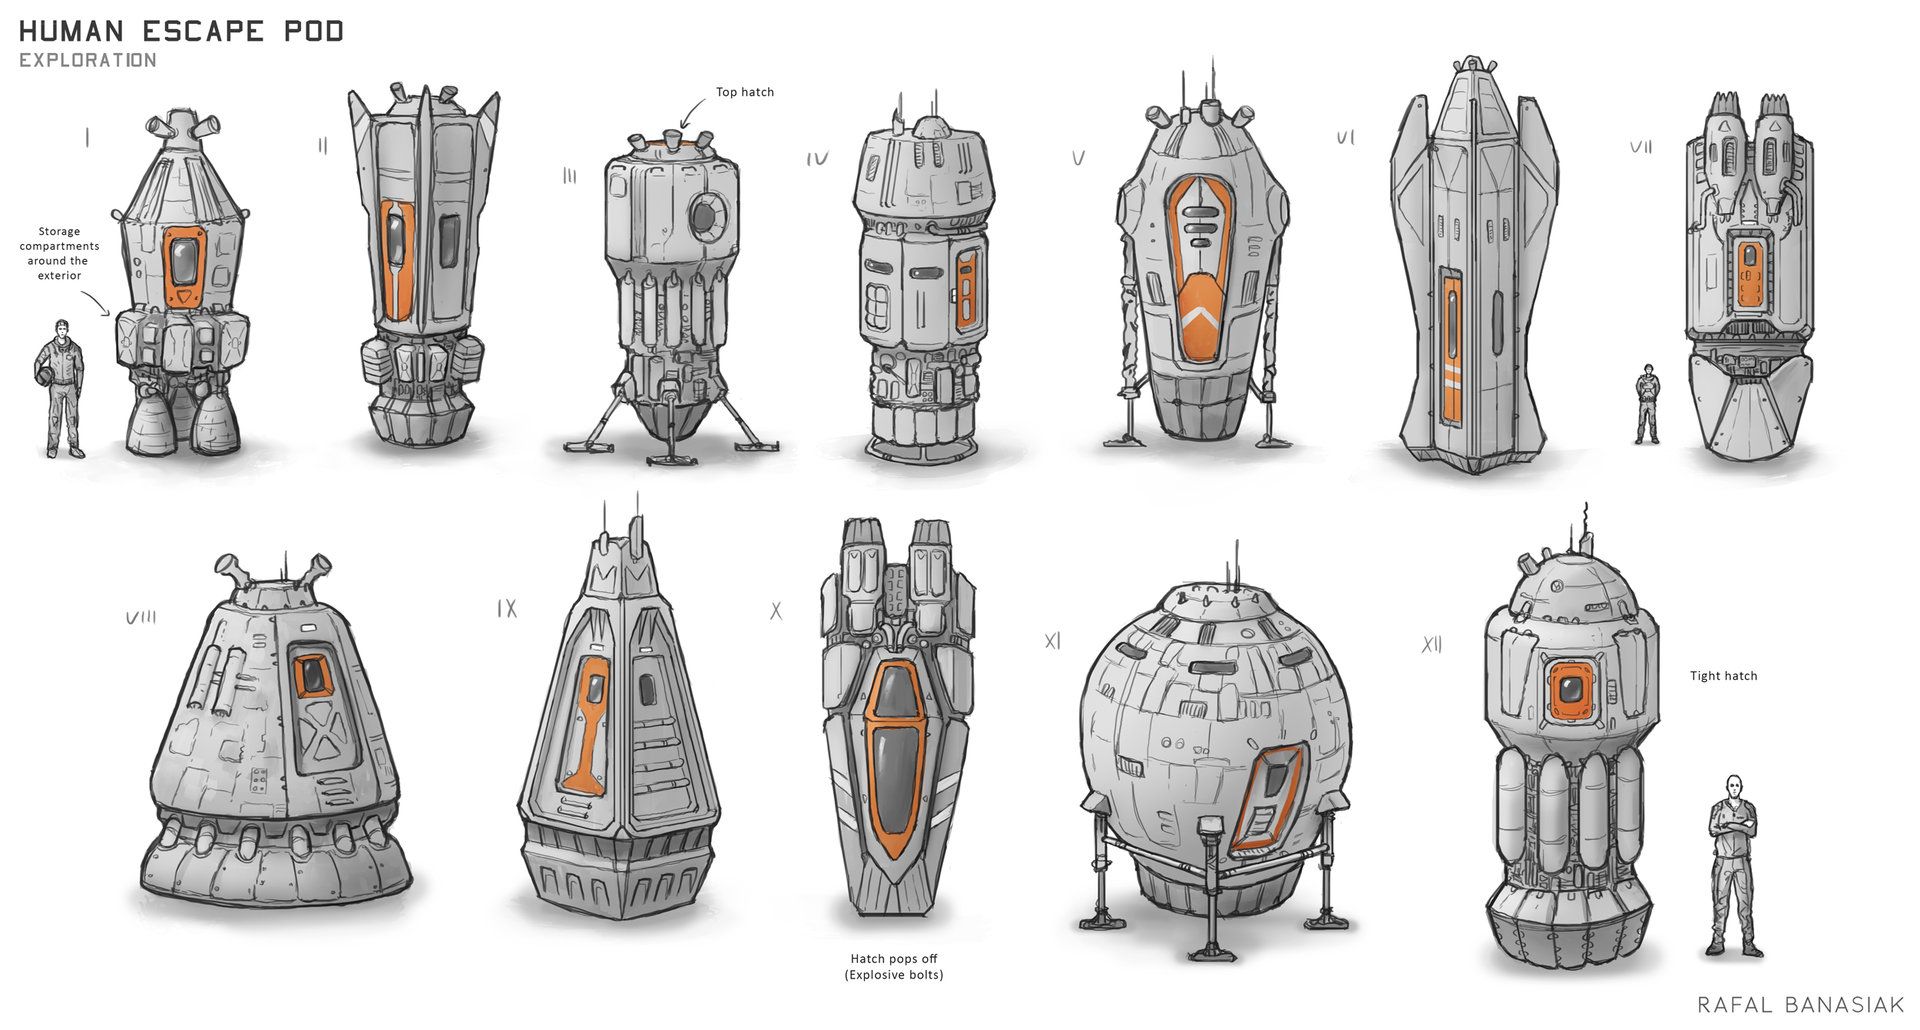
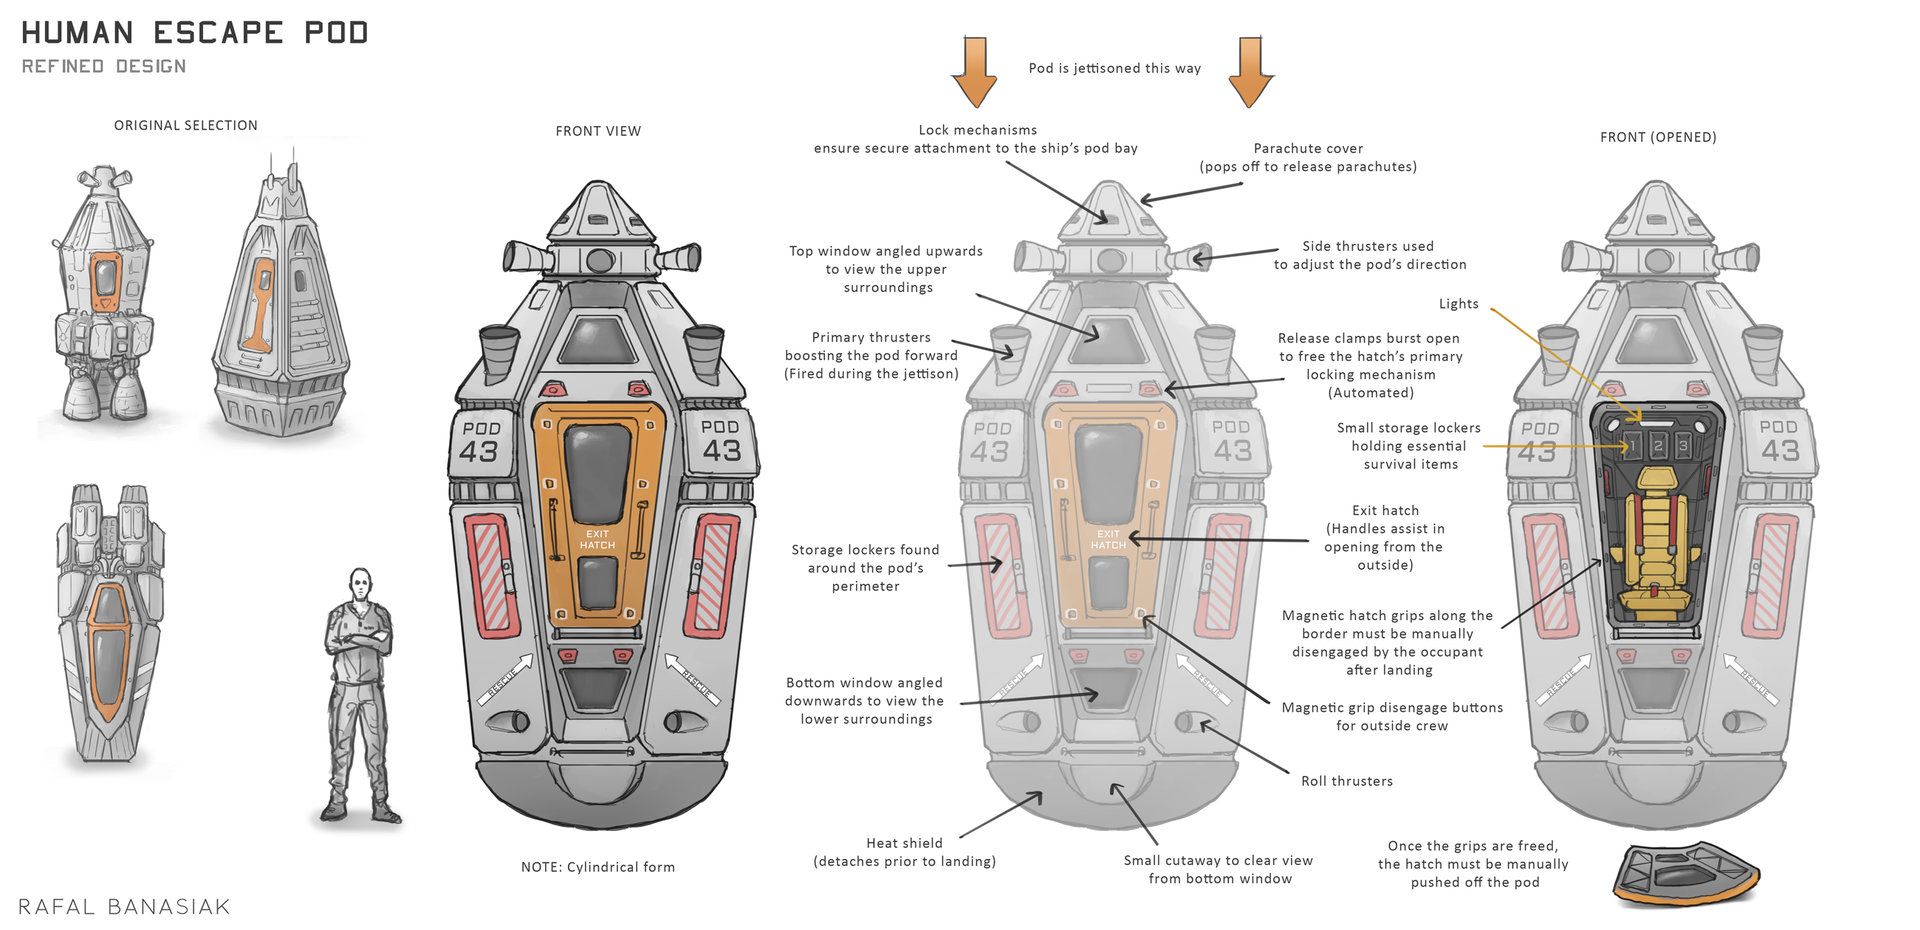
When exploring current escape pods in circulation, they all have a similar rounded shape with metallic features. The majority of ones also include expanding legs which can stabilise the rounded shape when the pod is close to land; this ensures that the human inside will be safe and won’t fall over on their side. Furthermore, it is clear that there is at least one window placed on each craft so that the human can see the outside which I would like to include when I design my future space pod. I have no initial requirements when thinking about my design process which allows for a large amount of creative freedom to be explored in the first stages of design.
Escape Pod Initial Sketches
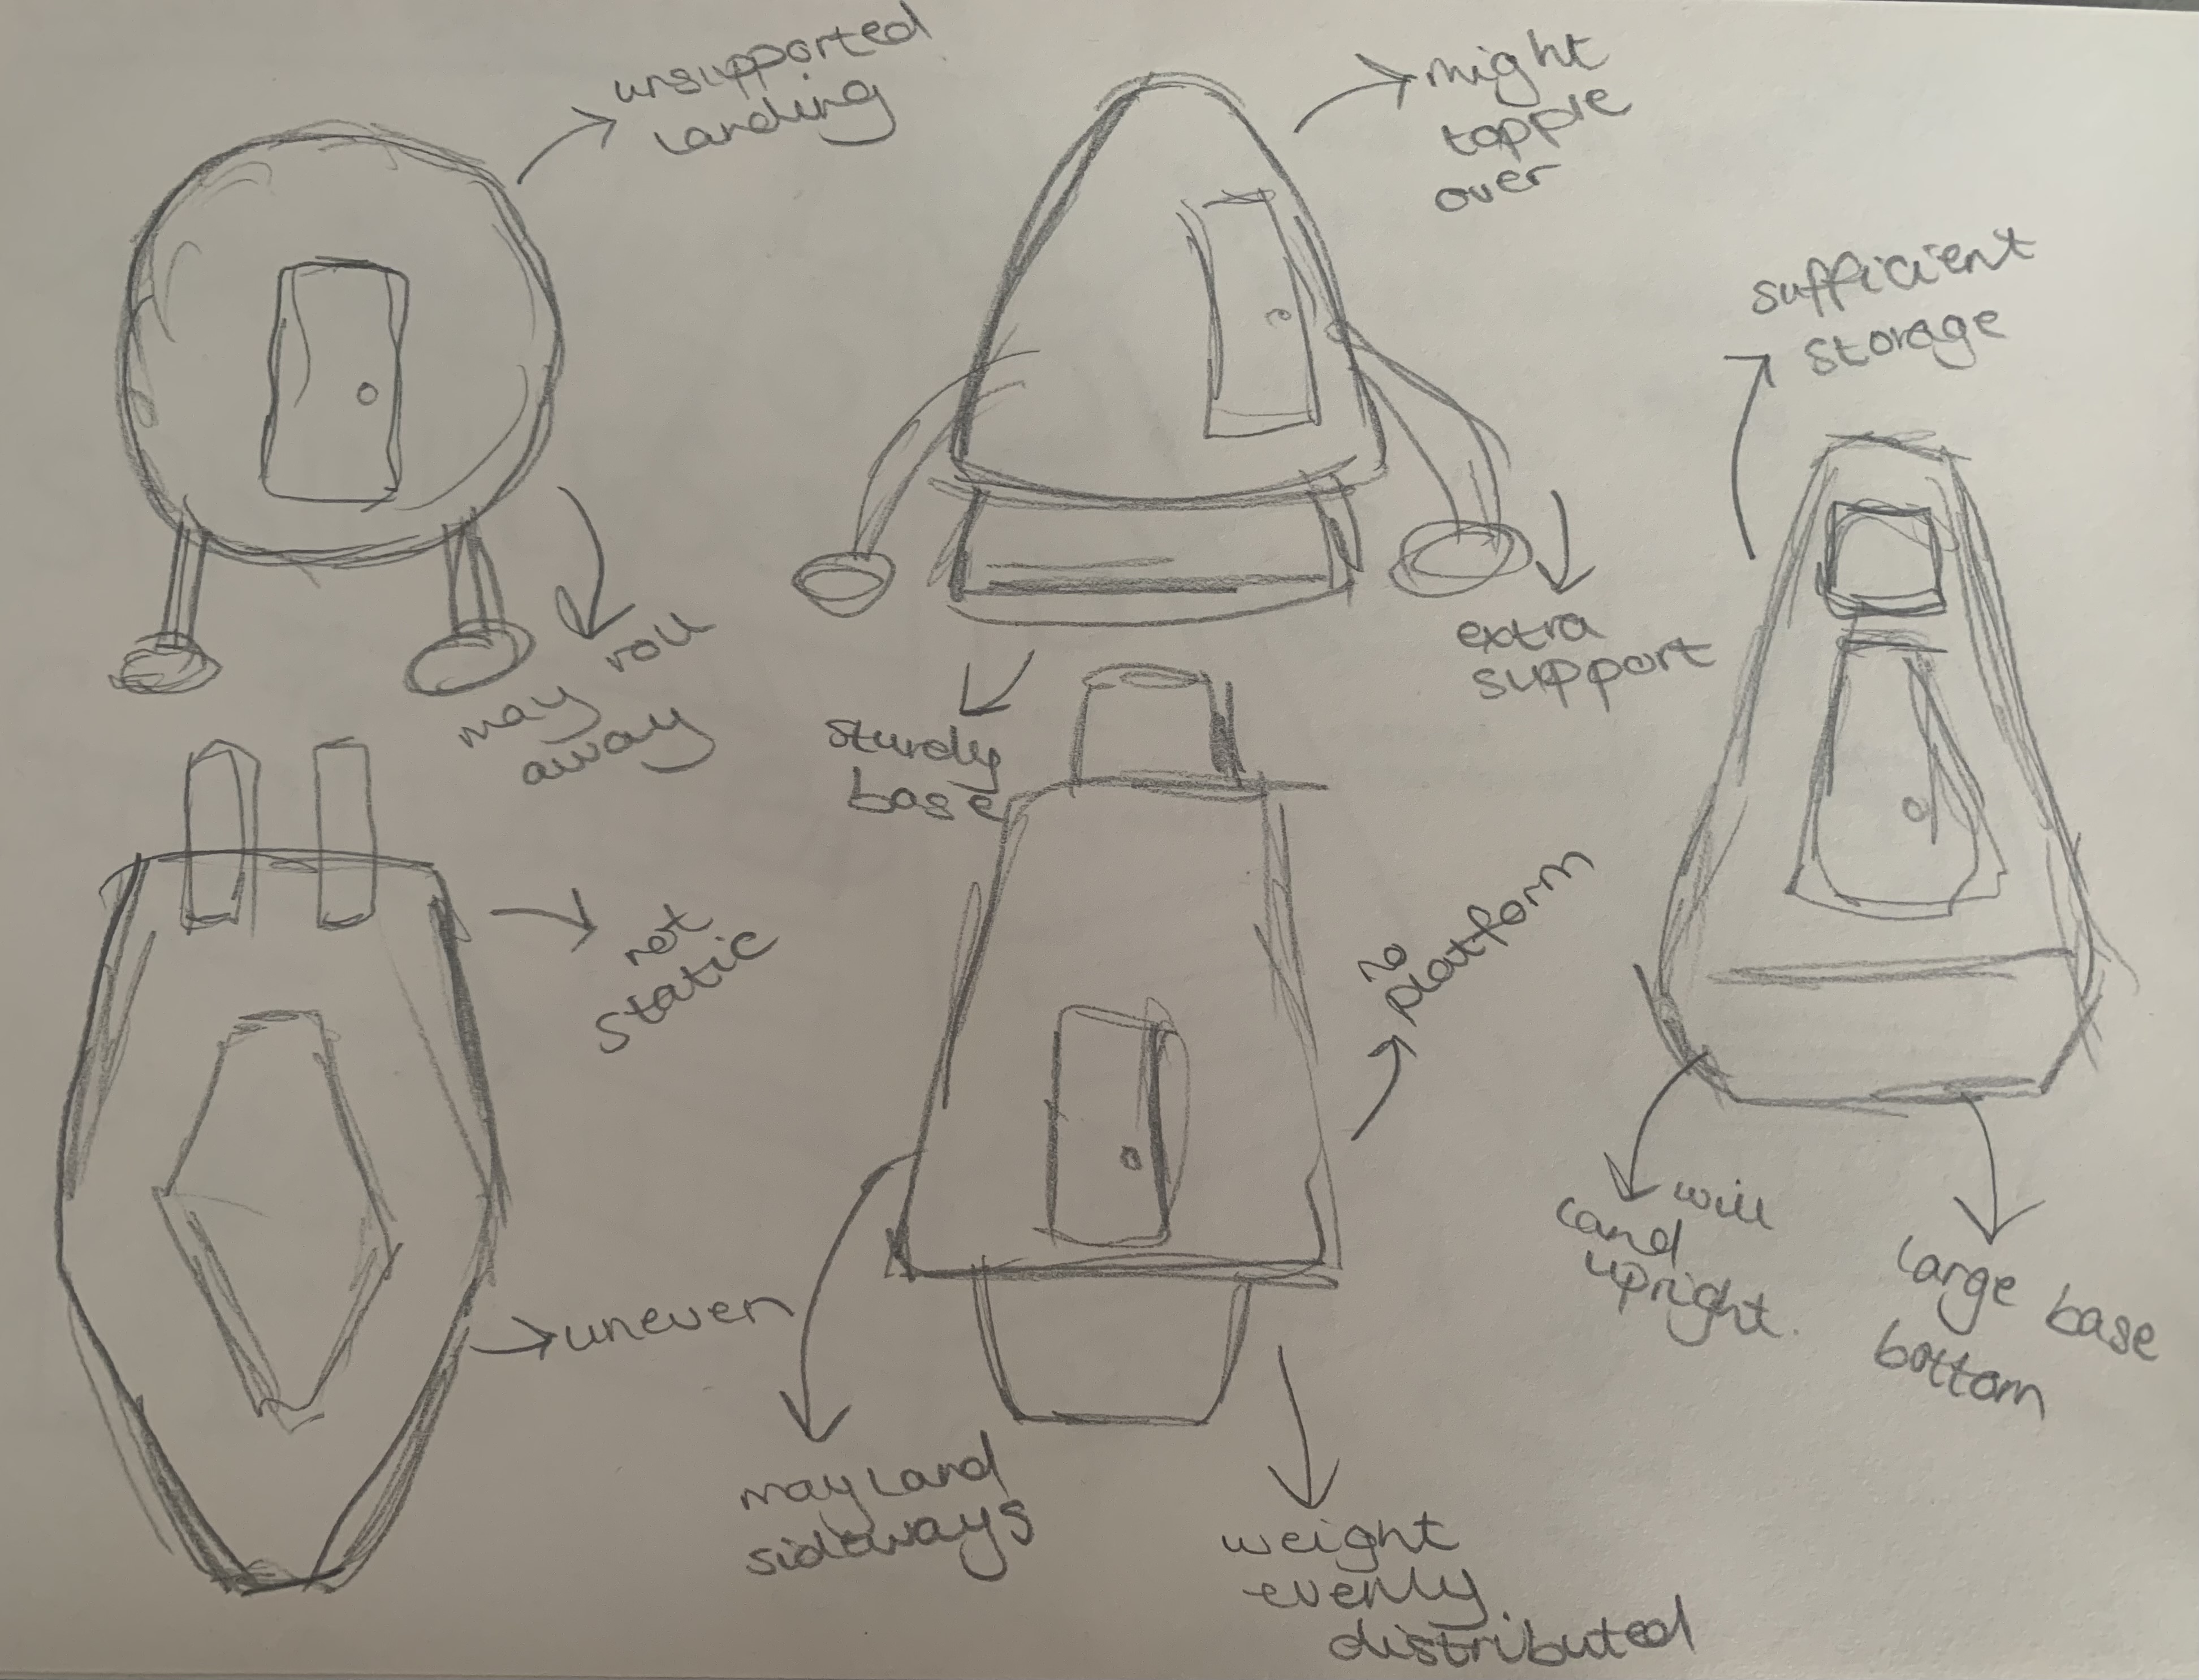
When thinking of what kind of shape I wanted my escape pod to be, my first thought was that it has to be stabilised when landing on the group so a complete spherical shape is ruled out. It also needs to be evenly weighted so that it can land straight and not fall over which means it must stay symmetrical. I enjoy the idea of a squared base so that the pod has a large area to land on, which then proceeds upwards to a smaller triangular shape for the body. This then forms a smaller point at the top to allow for the symmetry needed. After numerous trial and error sketches, I found my final shape that I will continue with for the rest of the project.
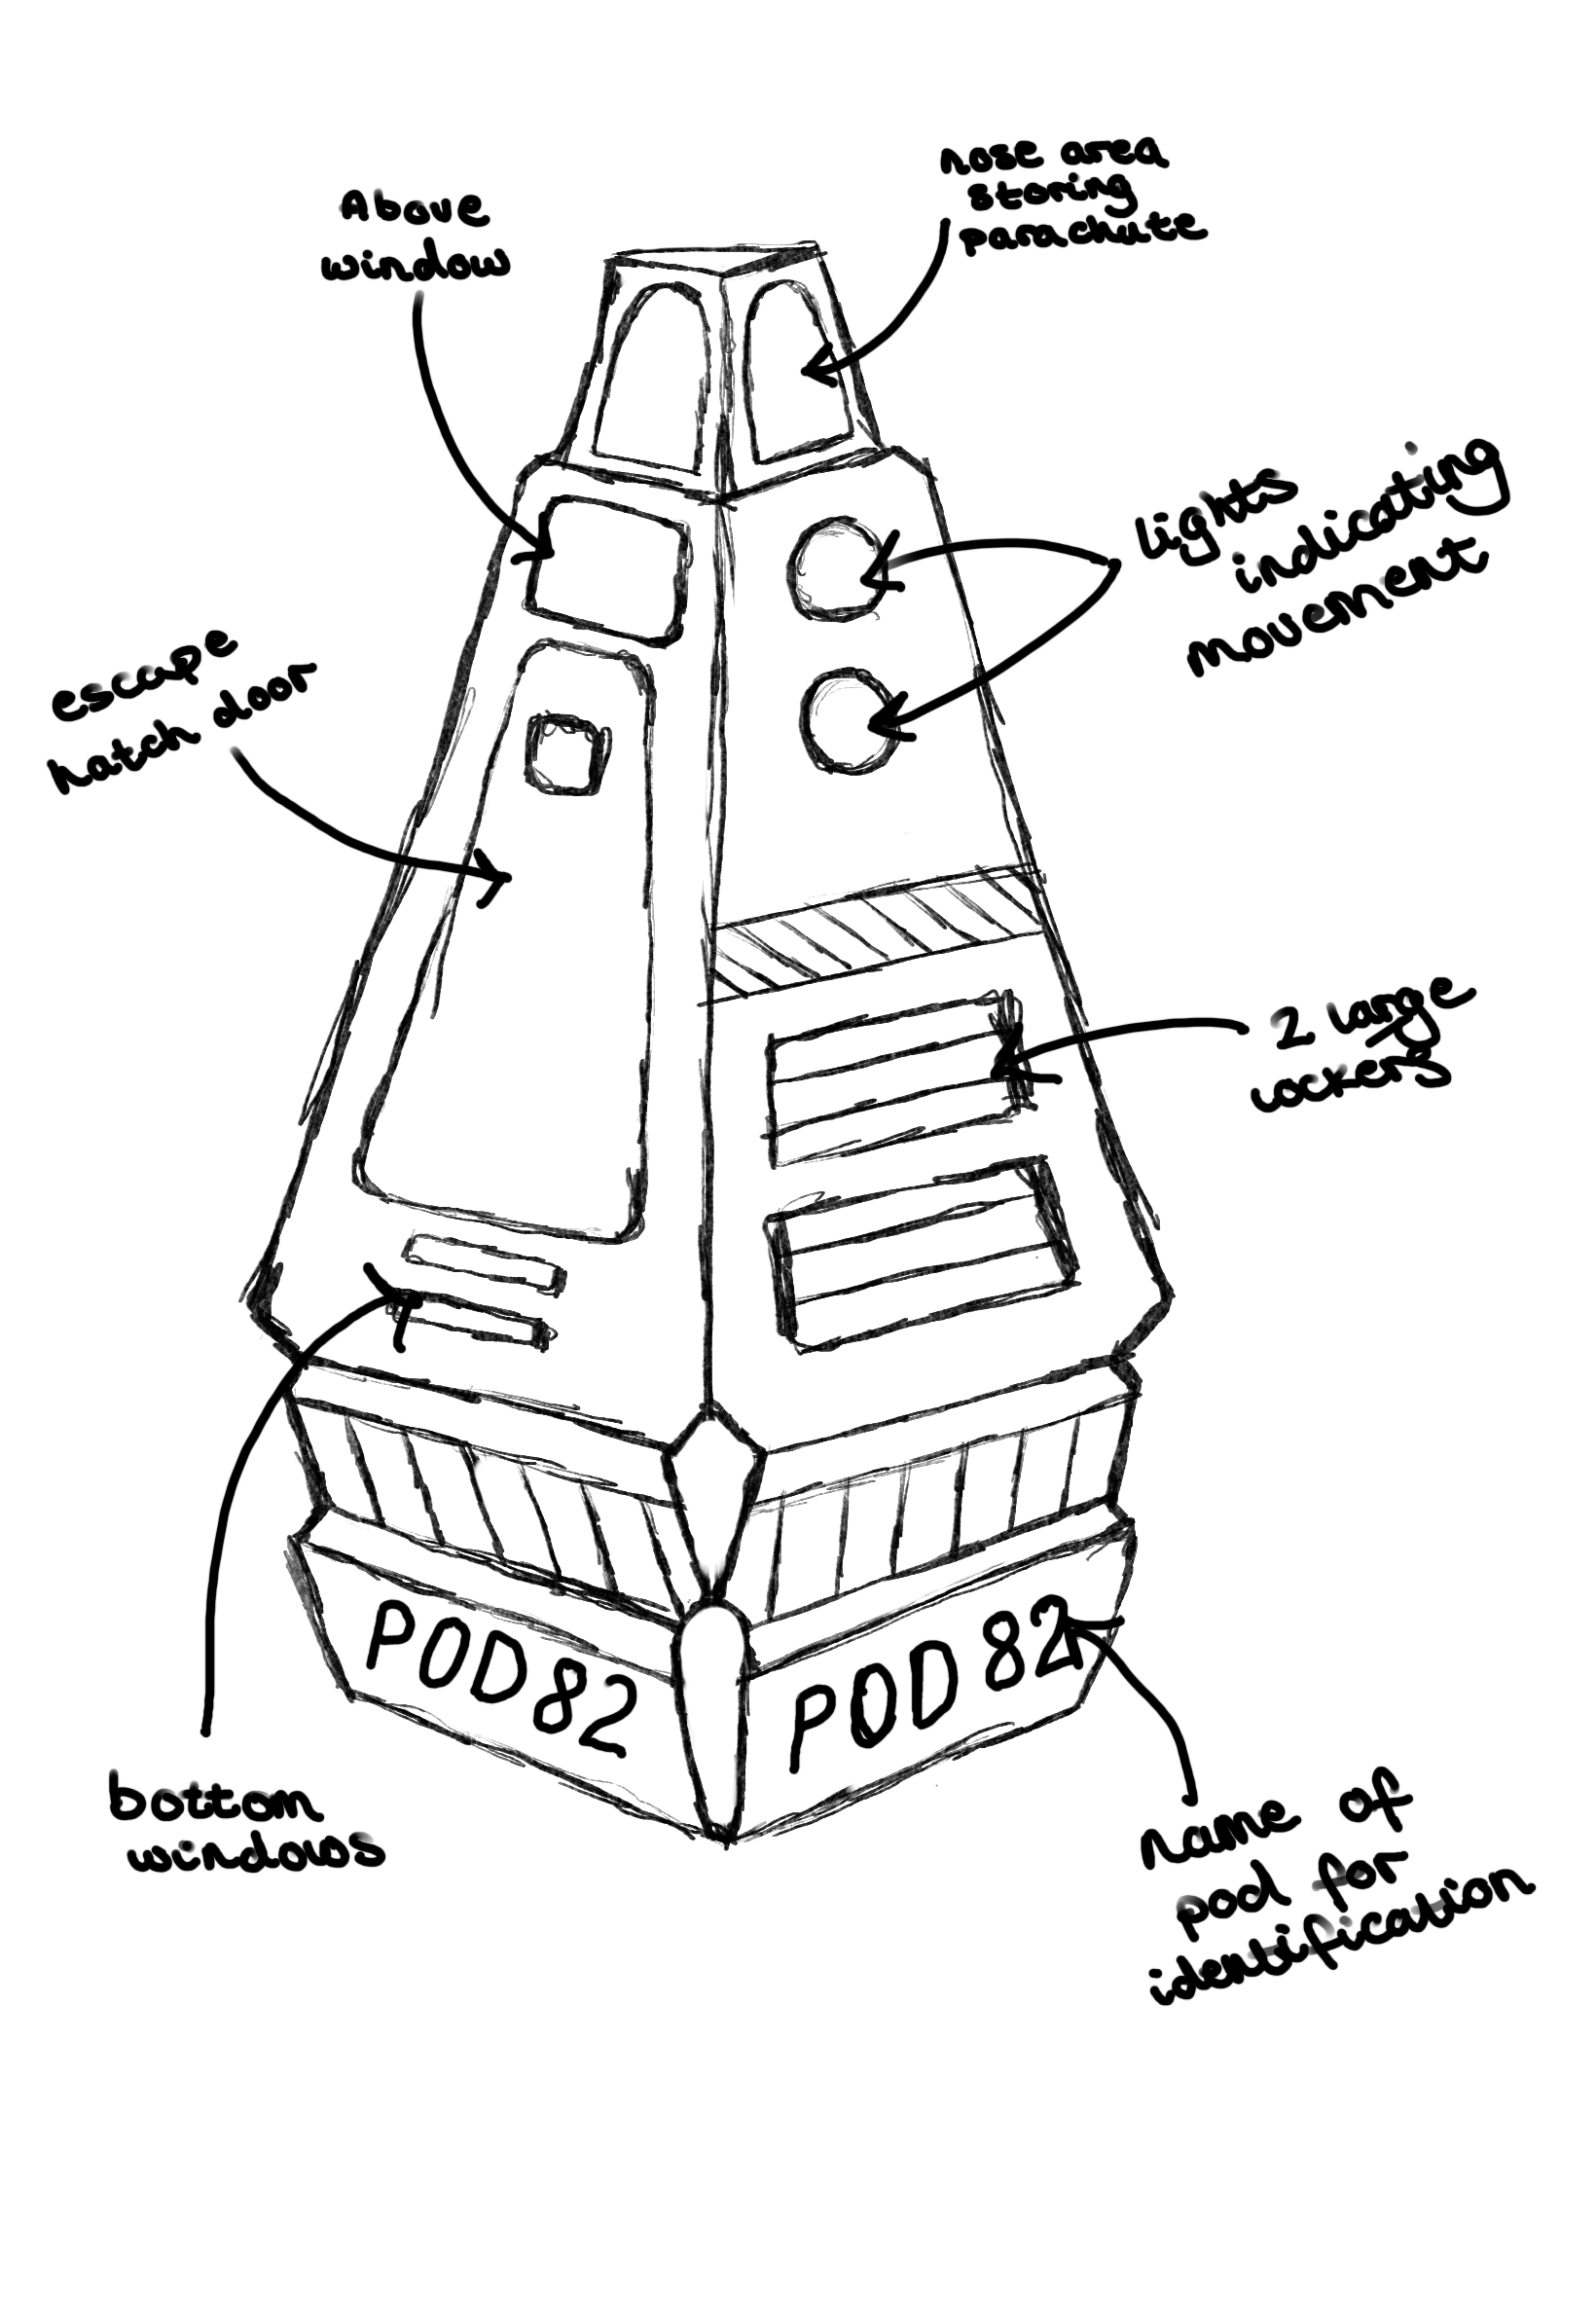
Once I was happy with the shape, I moved on to the detailing and what will be required on the pod. The main key feature needed is a door for the human inside to open and close to have access to the escape pod. This was clear to put on the front side so that people know the purpose and the fact that there is someone inside. This will follow the frame of the 3D form. At least one widow is also needed so that the person inside can gauge where they are at certain times. Instead of having one large window, I decided having two separate smaller ones will allow for more area to be seen through the pod. These will be placed on top and below of the door so that the person can see both perspectives.
The parachute also needed to be stored at the top of the escape pod so that a smooth landing can take place and the pod can remain upright on land to ensure that the user’s comfort is maintained. This will remain inside a small hatch at the nose of the pod. There will also be larger lockers placed on the outside to allow for the user to travel with any necessary items that won’t fit inside of the pod. Other features such as the name of the space based escape pod and directional signs on the outerwear will be created and produced in a later brief.

Design Development Process on Maya
It was time to transform this basic 2D sketch into a 3D Model in Autodesk Maya. Before I brought anything into the software, I needed to create my referencing images that would be placed into the software so that I can map out each shape to correctly align them with each other. Using the rough sketches above, I created clean and uniformed references in Adobe Illustrator which you can see below.

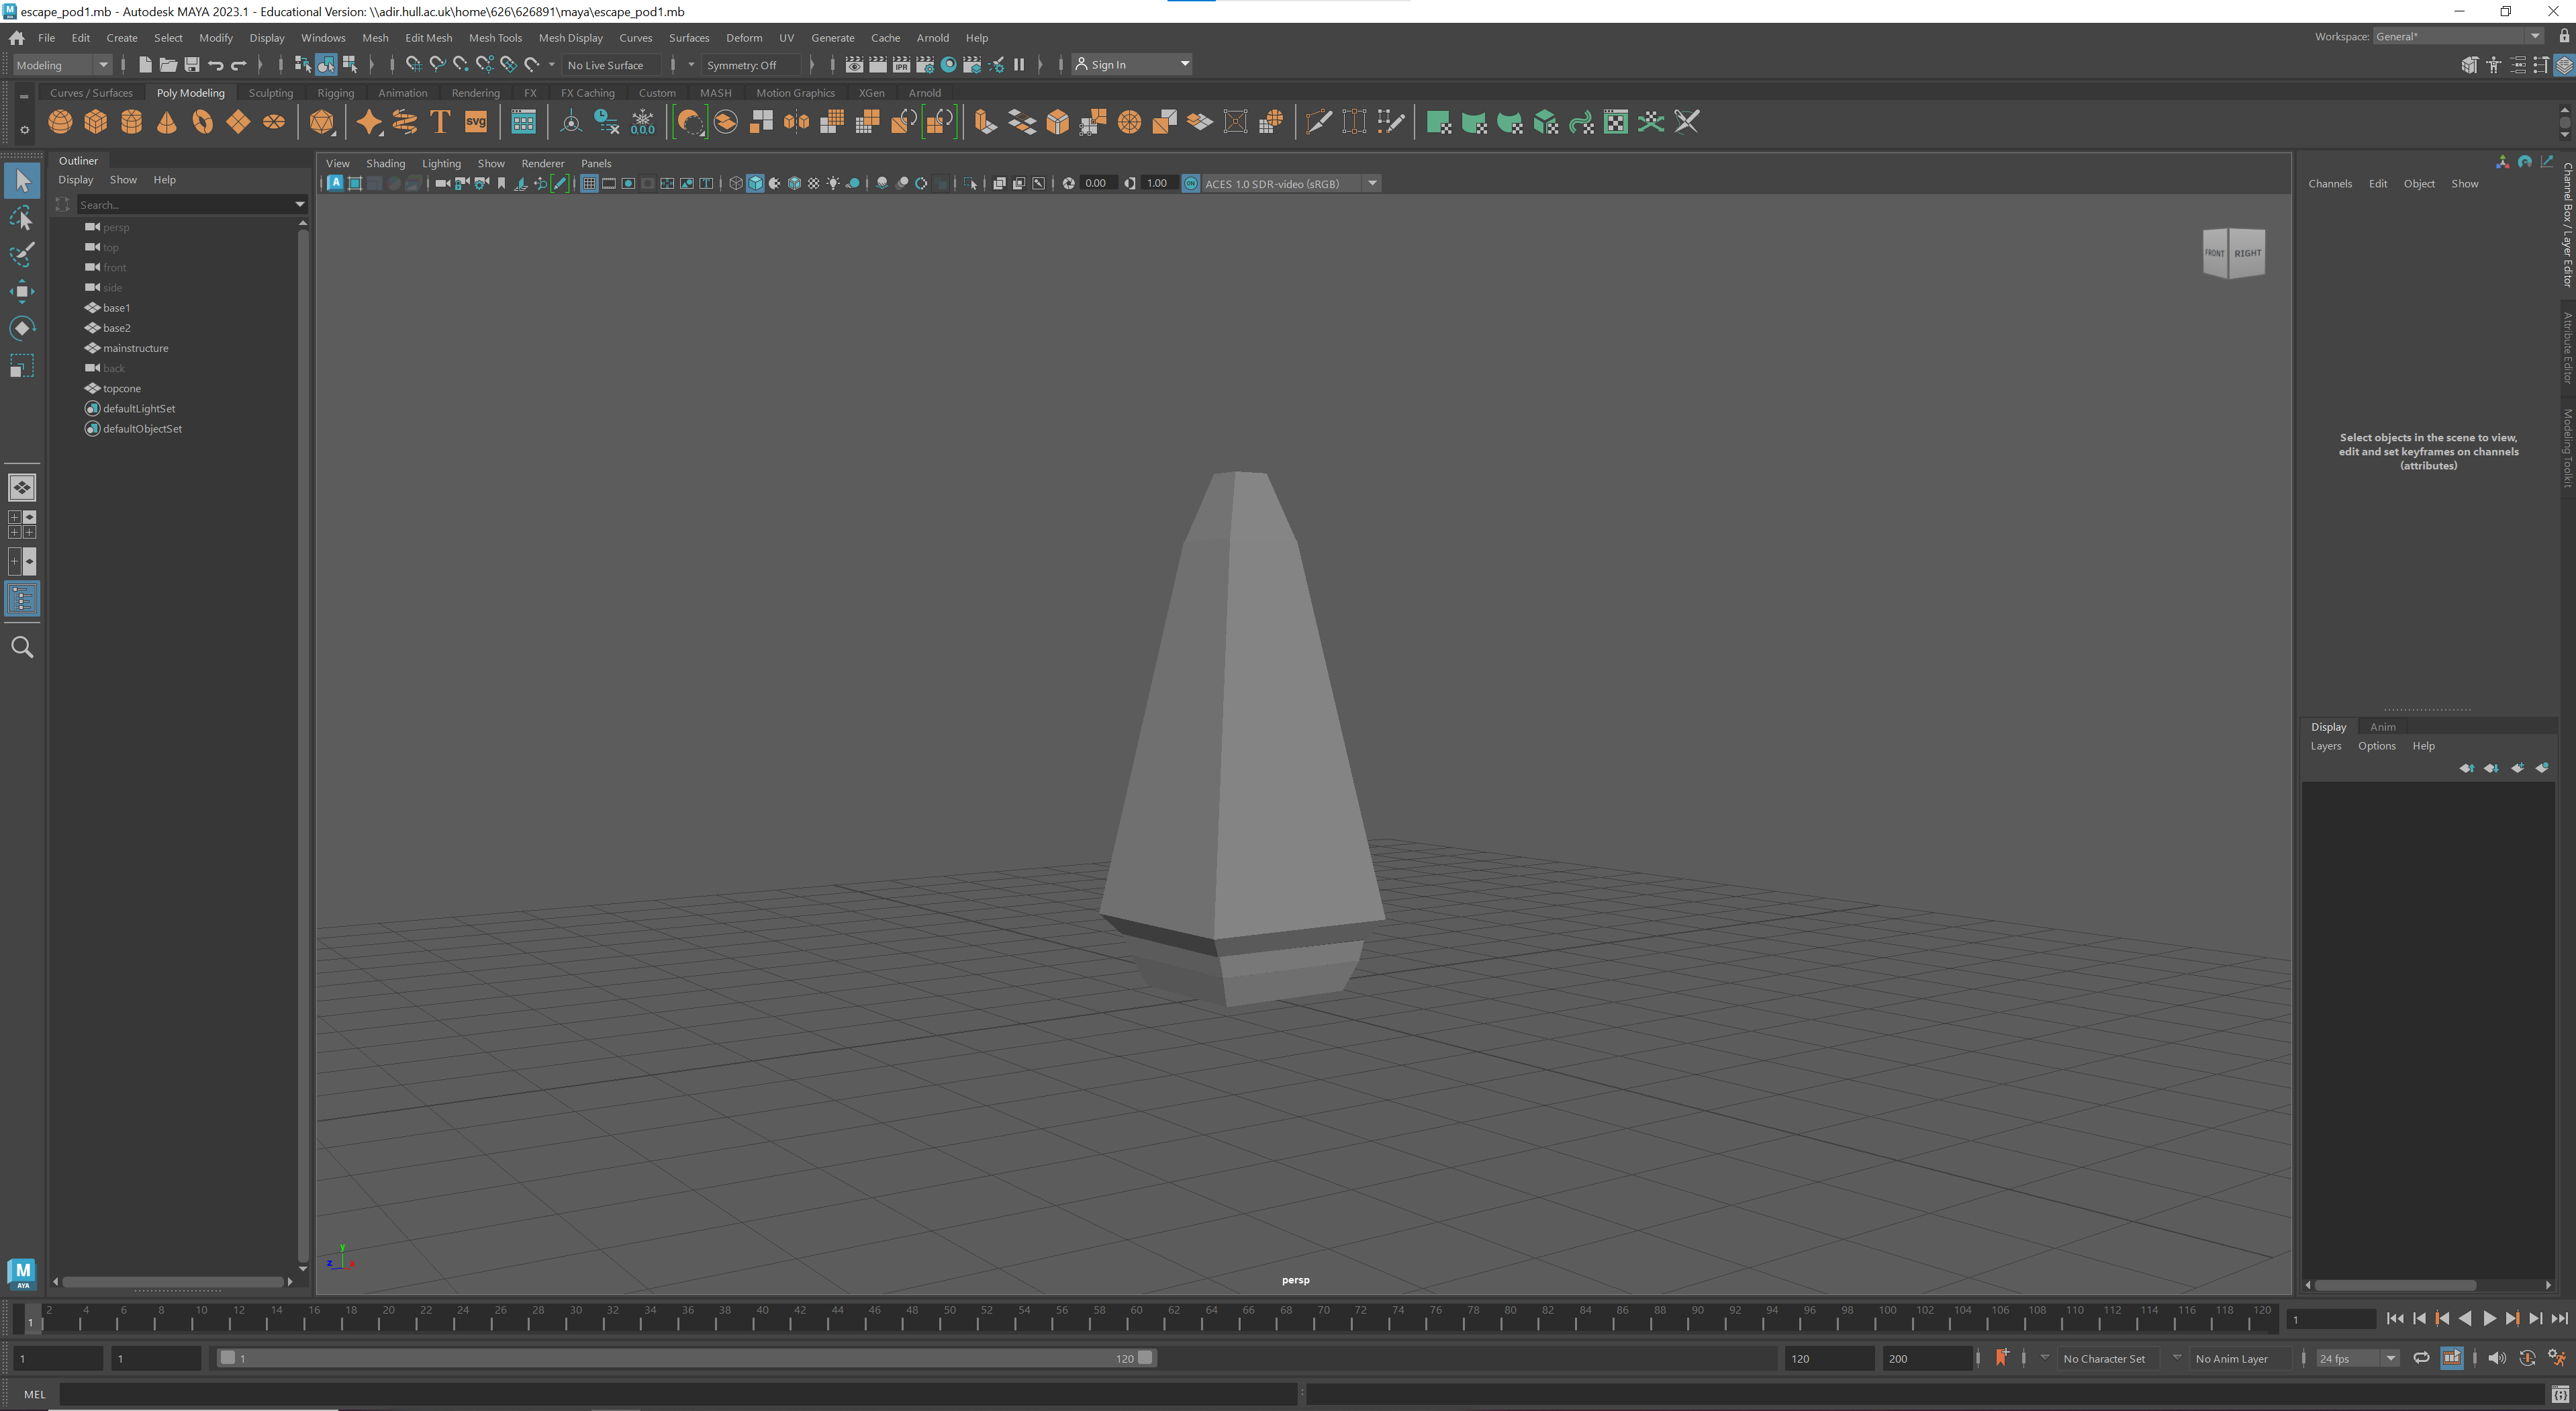
Once they had been imported and aligned correctly, I focused on making the bulk shape of the escape pod. My design consisted of numerous straight edges so it was clear that the cube poly model should be used for this. After adding the cube to make up the base mesh, I needed to alter the different edges and vertices so that these matched the pod sketch. Using the scale tools given in the toolbar, I was able to move each particular component to my liking. This created a triangular like shape that formed my main structure.
Then I moved onto the nose cone at the top and then structured base bottom of the escape pod. I used the extrude option when altering the edges to add extra faces so that I wouldn’t change the main shape. I further angled this top triangular shape so that this pointed closer together and created a separate section. I then tackled the bottom of the escape pod which had separate cube shaped landing points working its way up to the main structure. I used the same method by extruding and adding more sections into the shape so that I can conform the areas to how I like it. I ended up with three different cubed layers that work their way up to the size of the larger area. I focused on changing the shape of the vertices within the extruded areas to allow them to angle upwards in a specific way. These methods successfully allowed me to create the main base mesh for my escape pod.
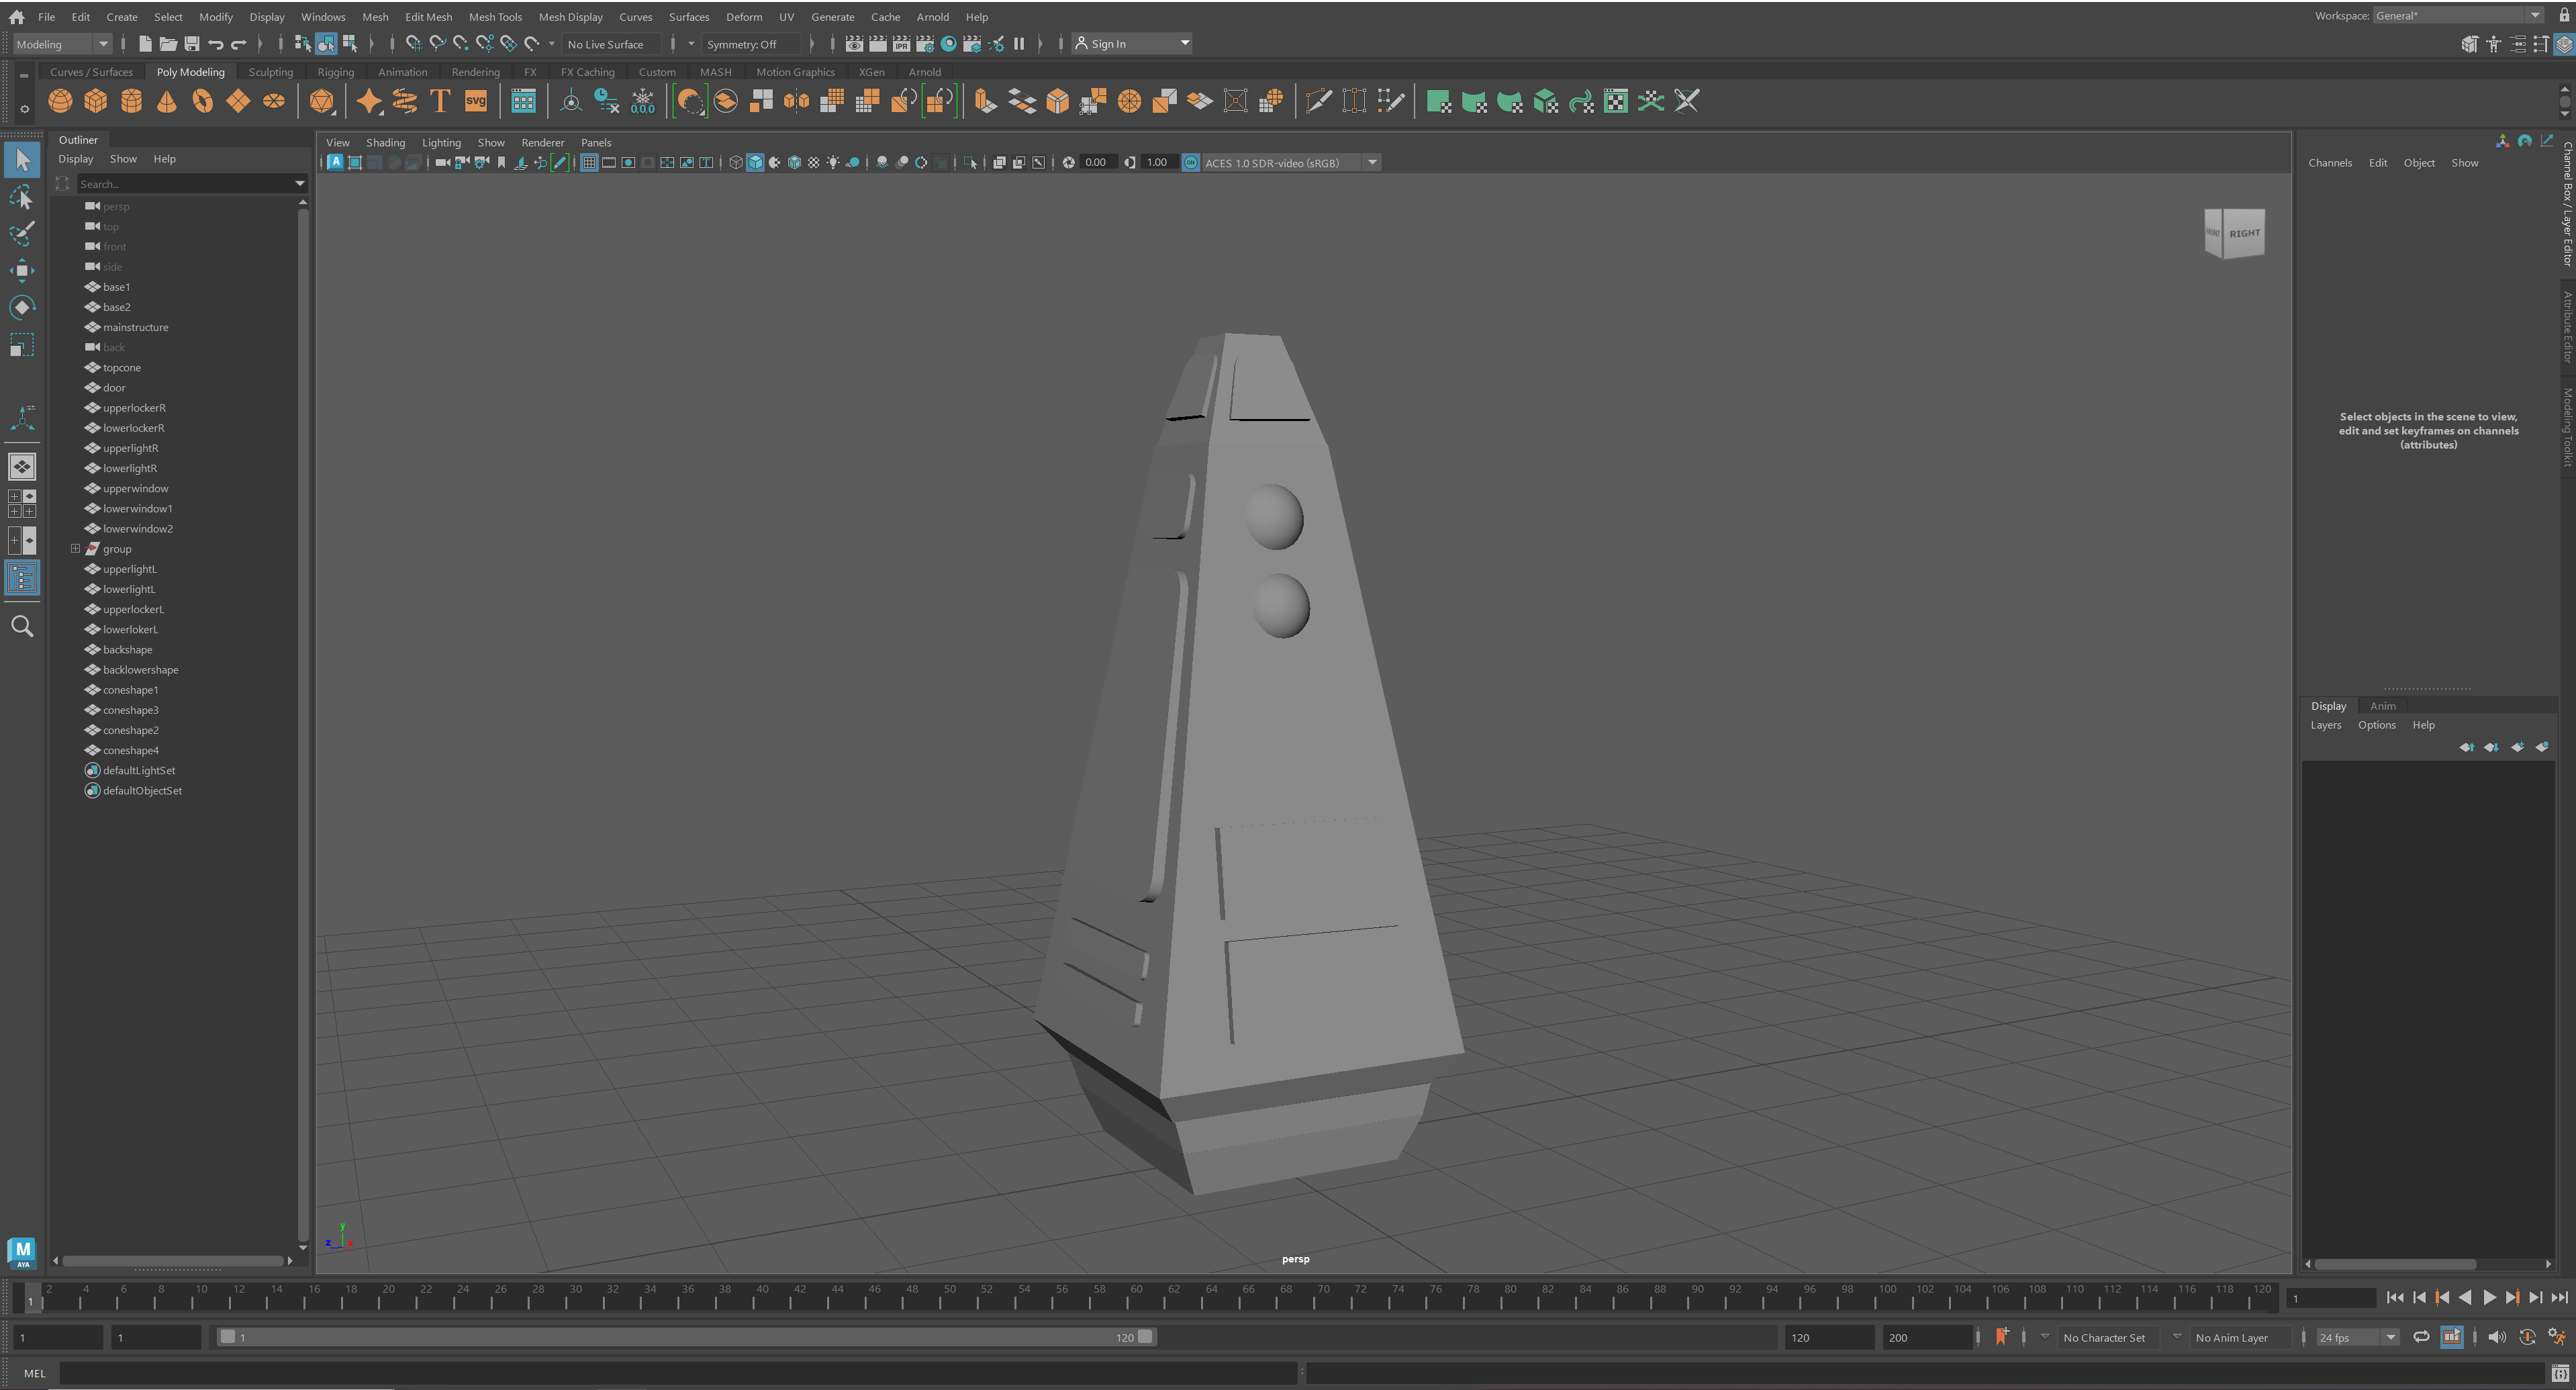
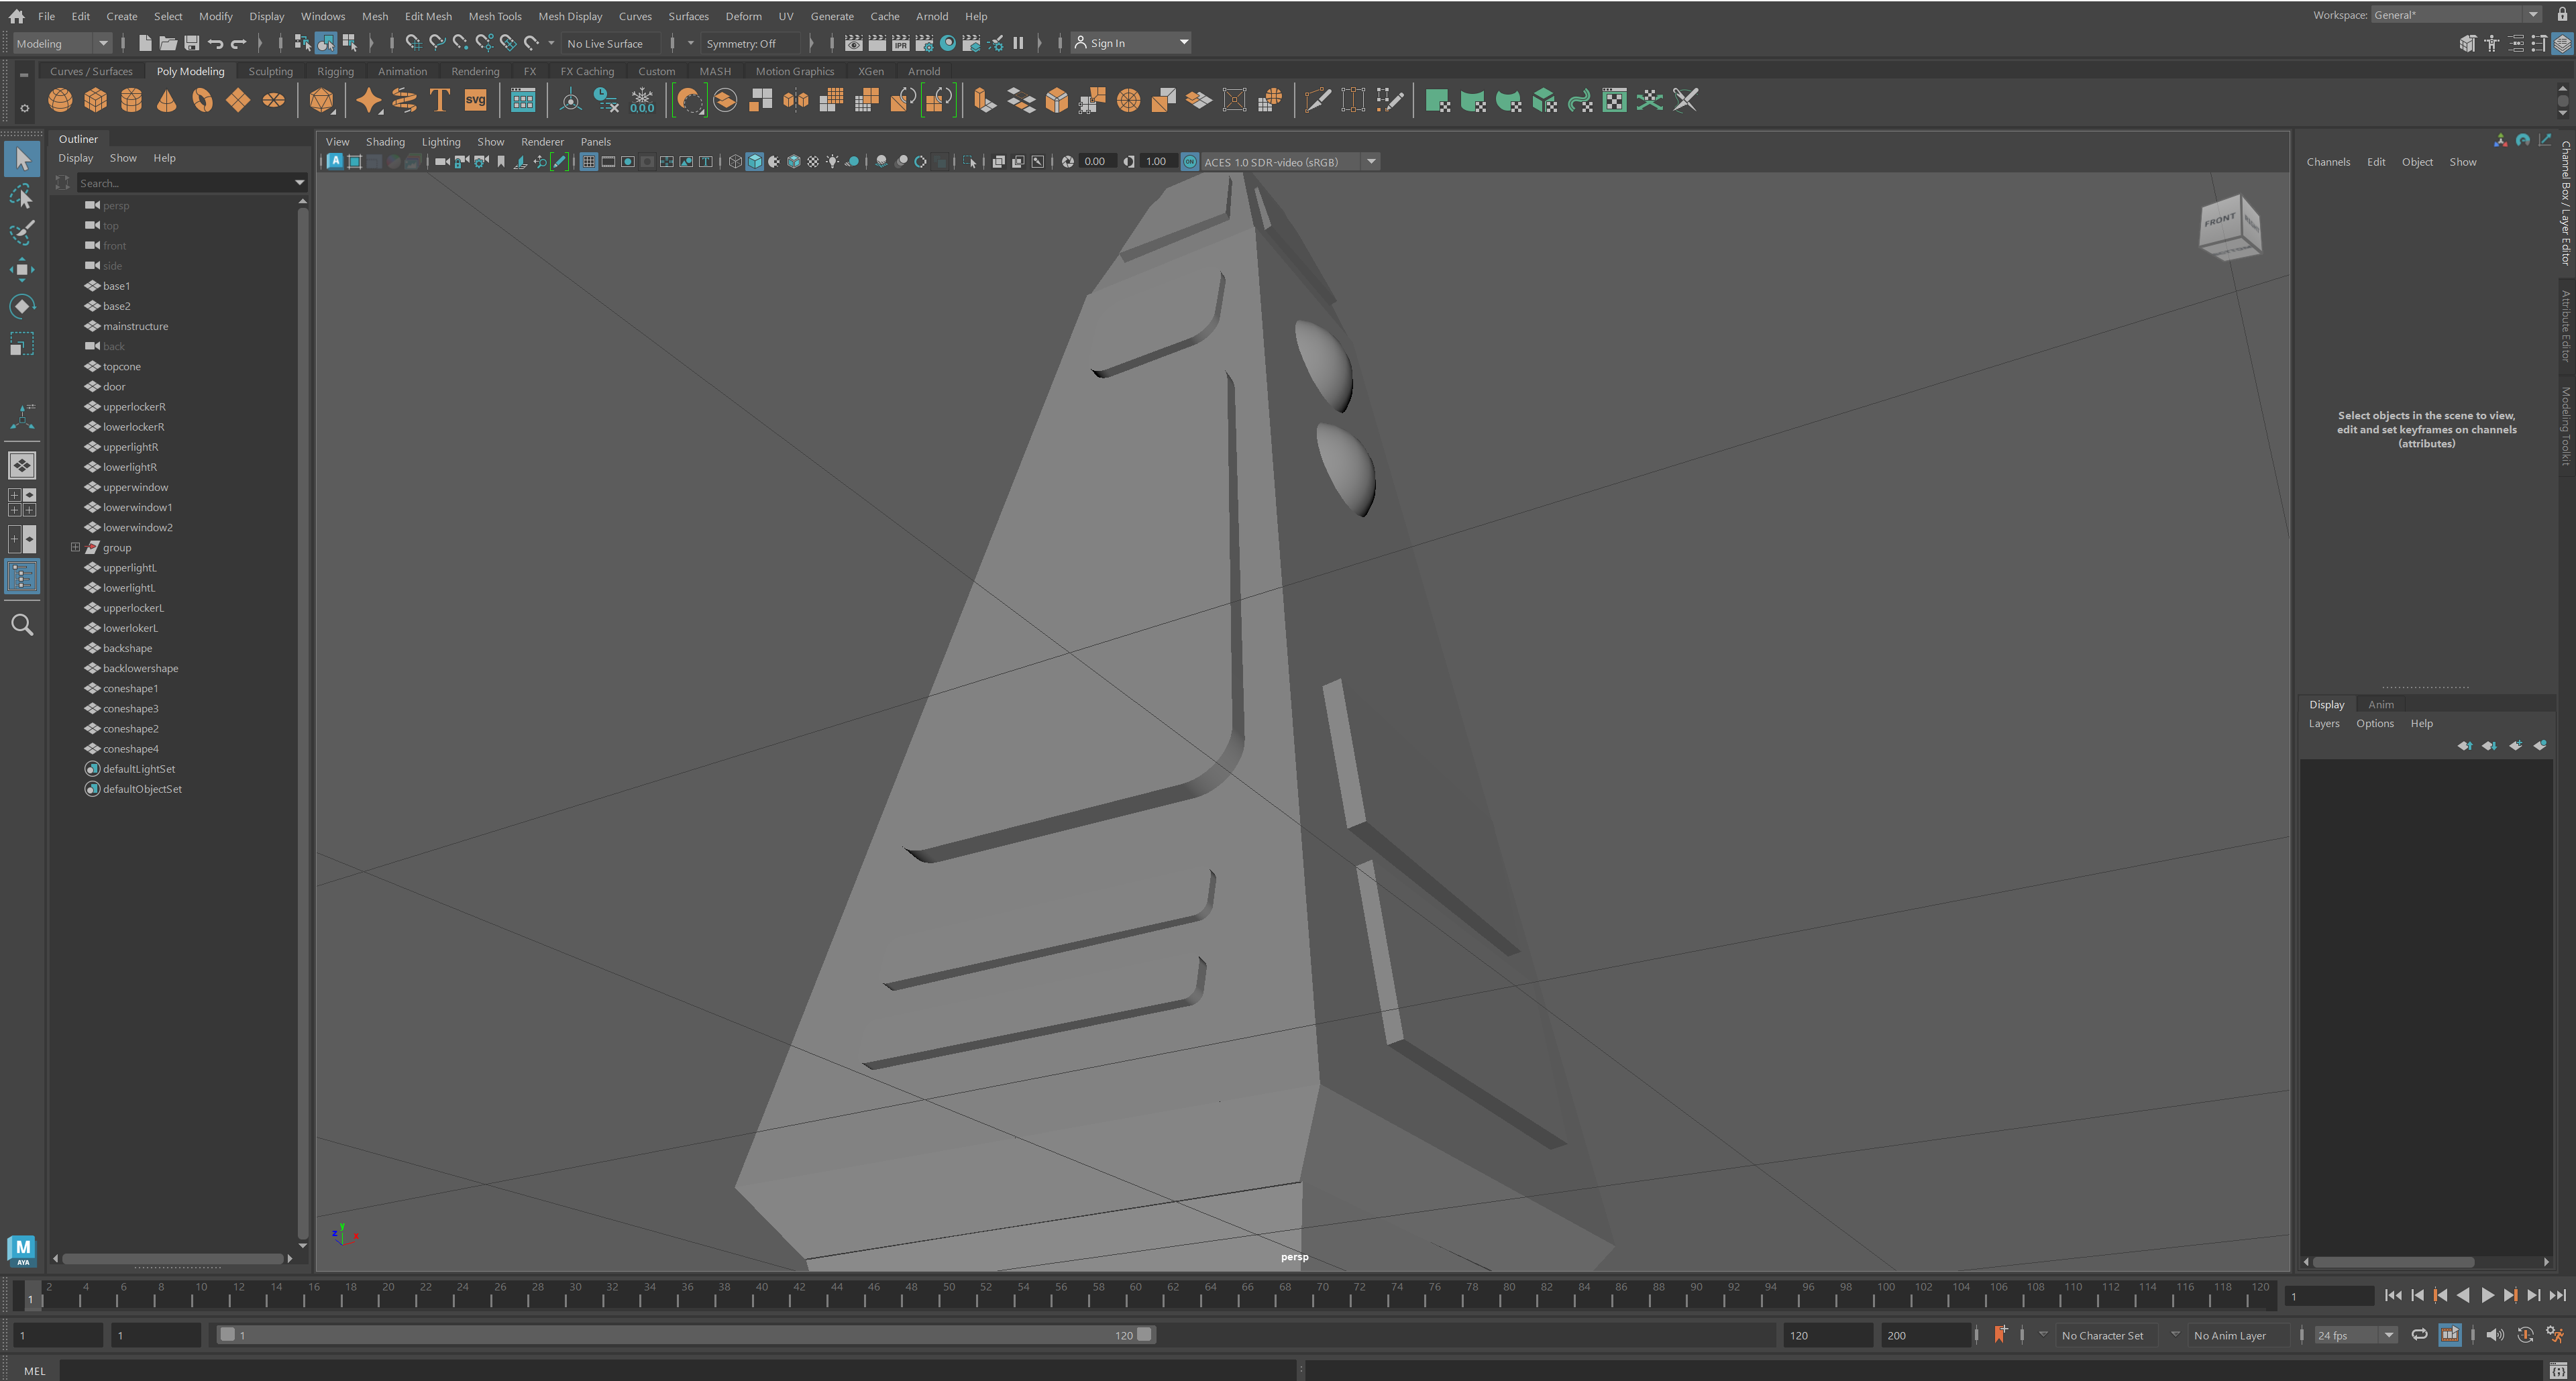
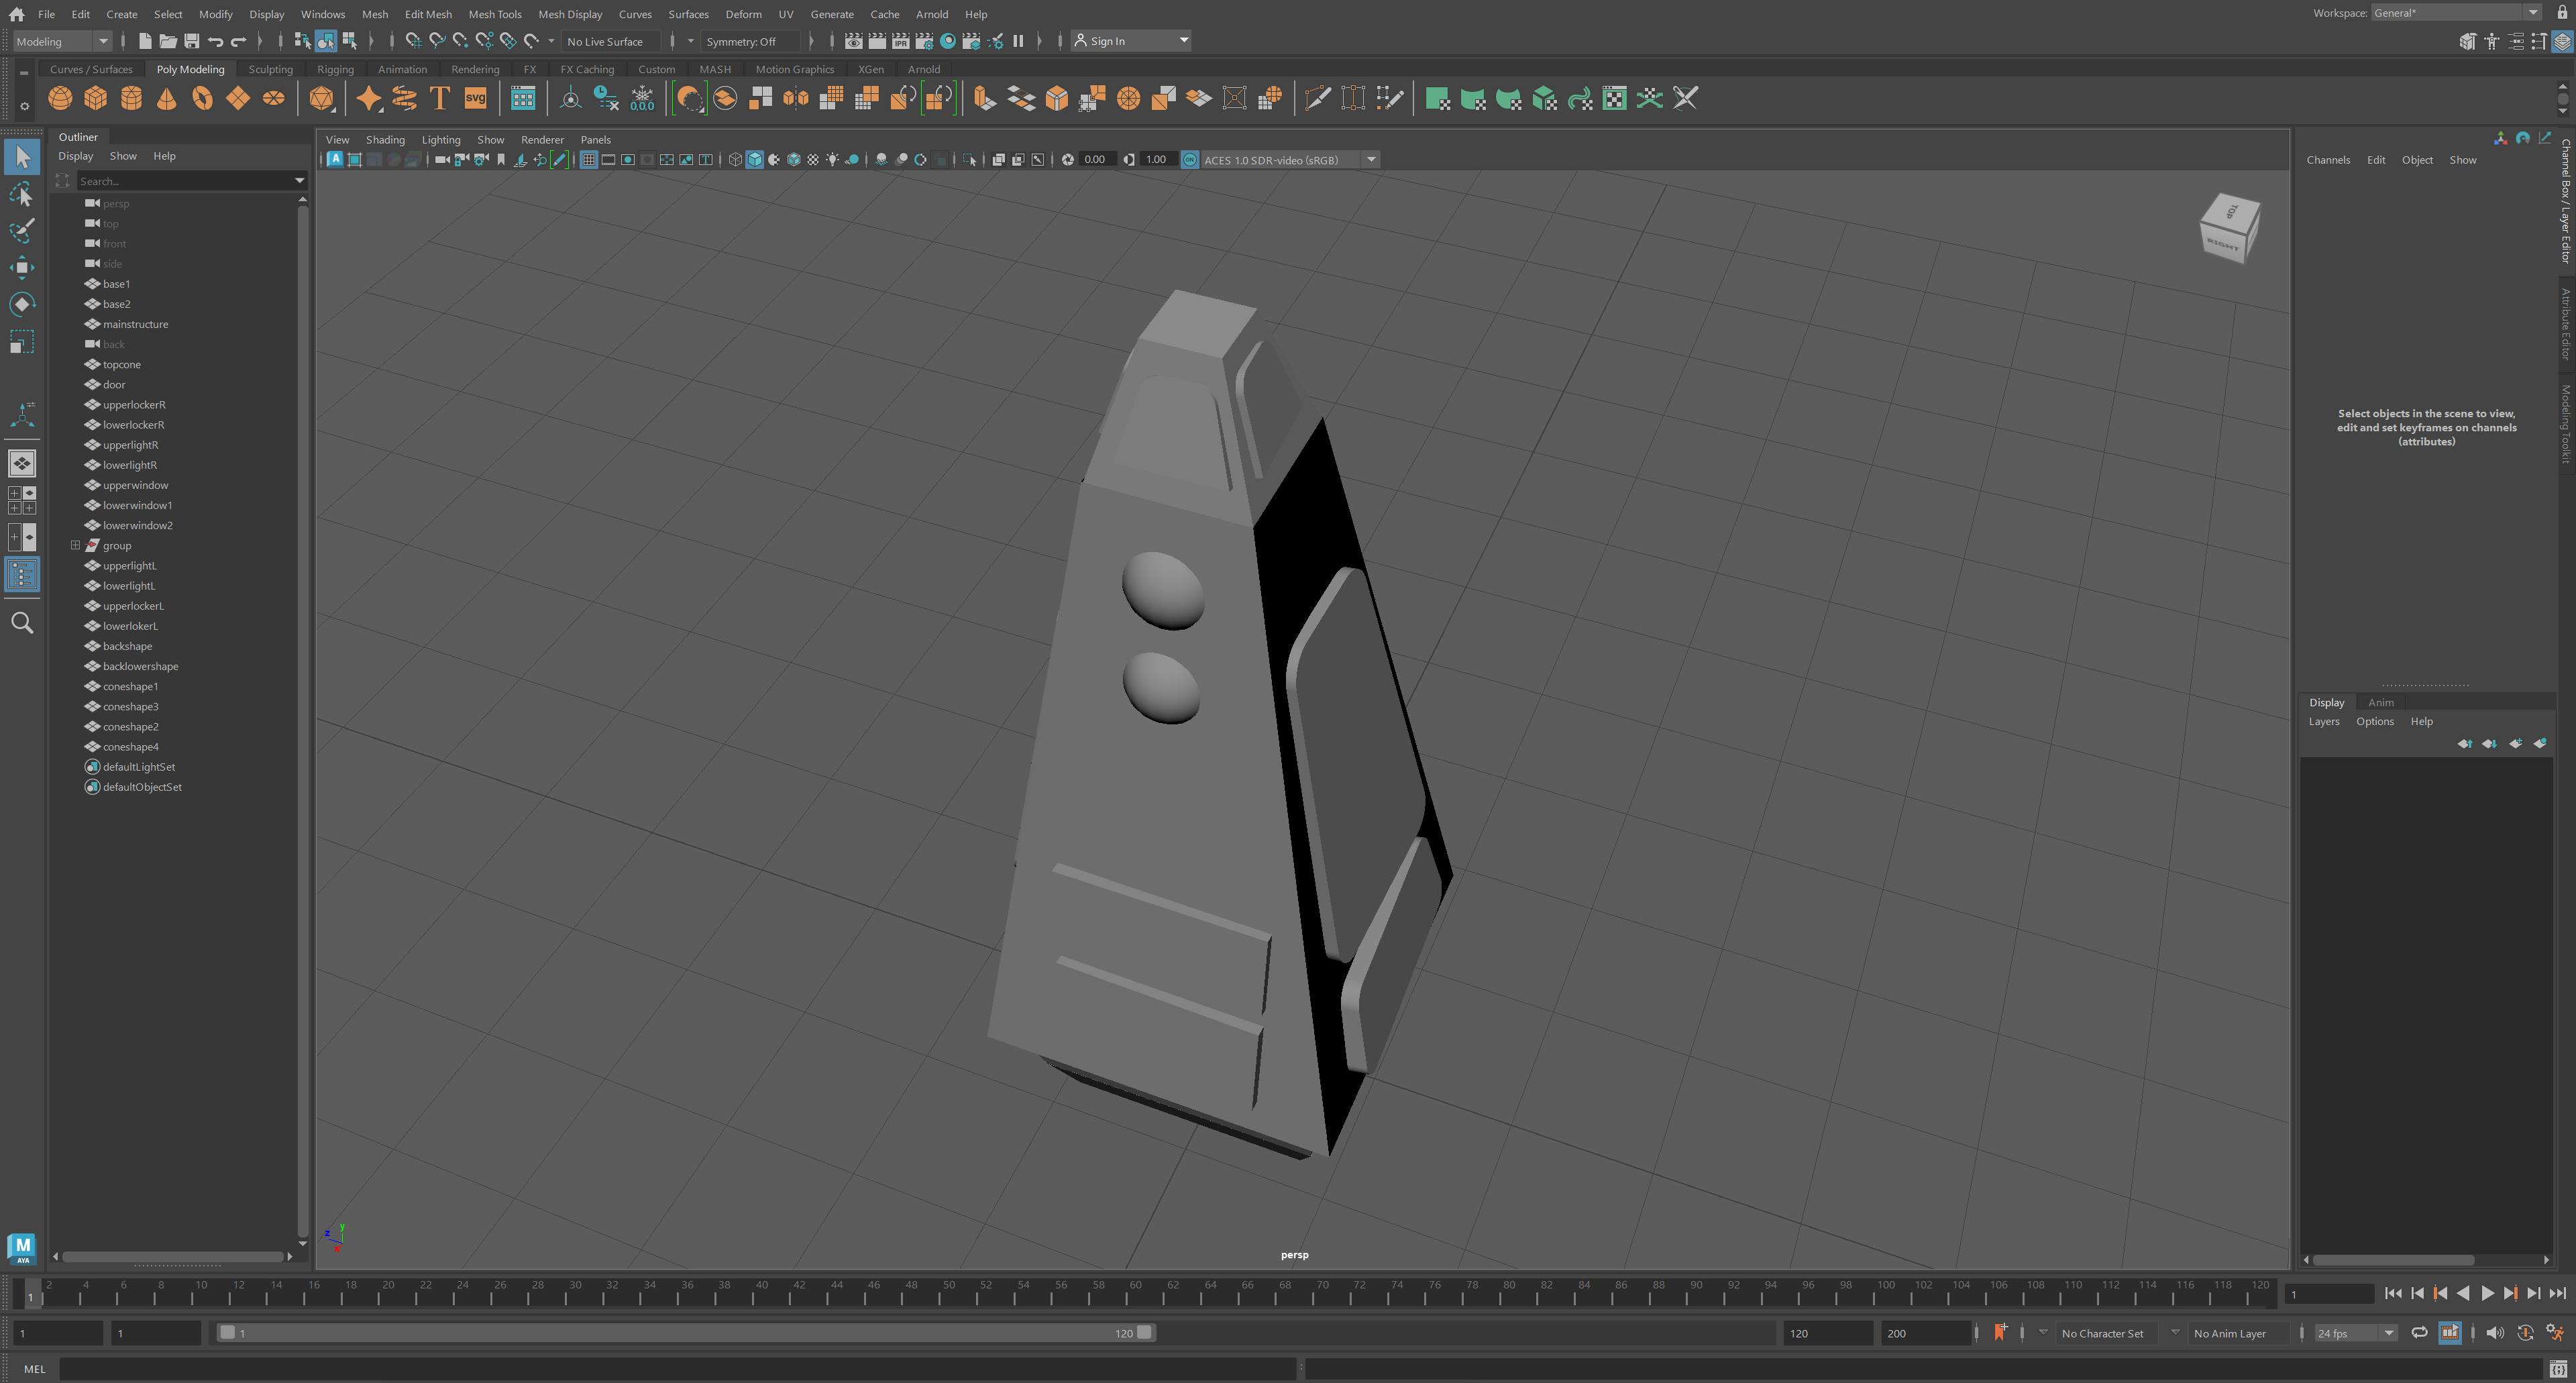
When moving onto the finer details, I was able to use separate shapes to incorporate them into my escape pod. Beginning with the main door, I used the Boolean tool to add curvature to straight-edged shapes. This enhanced my design and linked back to the initial sketches. This tool was used thoroughly when wanting to complete curved edges. I also used the sphere poly to create my lights that would shine to warn people of the incoming pod. The sphere perfectly allowed for clean and smooth edges to be imported. All of the individual shapes and bulges will be textured differently when we move onto that in the next project. Using different tools and techniques allowed me to uniquely redesign each poly shape to match the rustic design of my space-based escape pod.
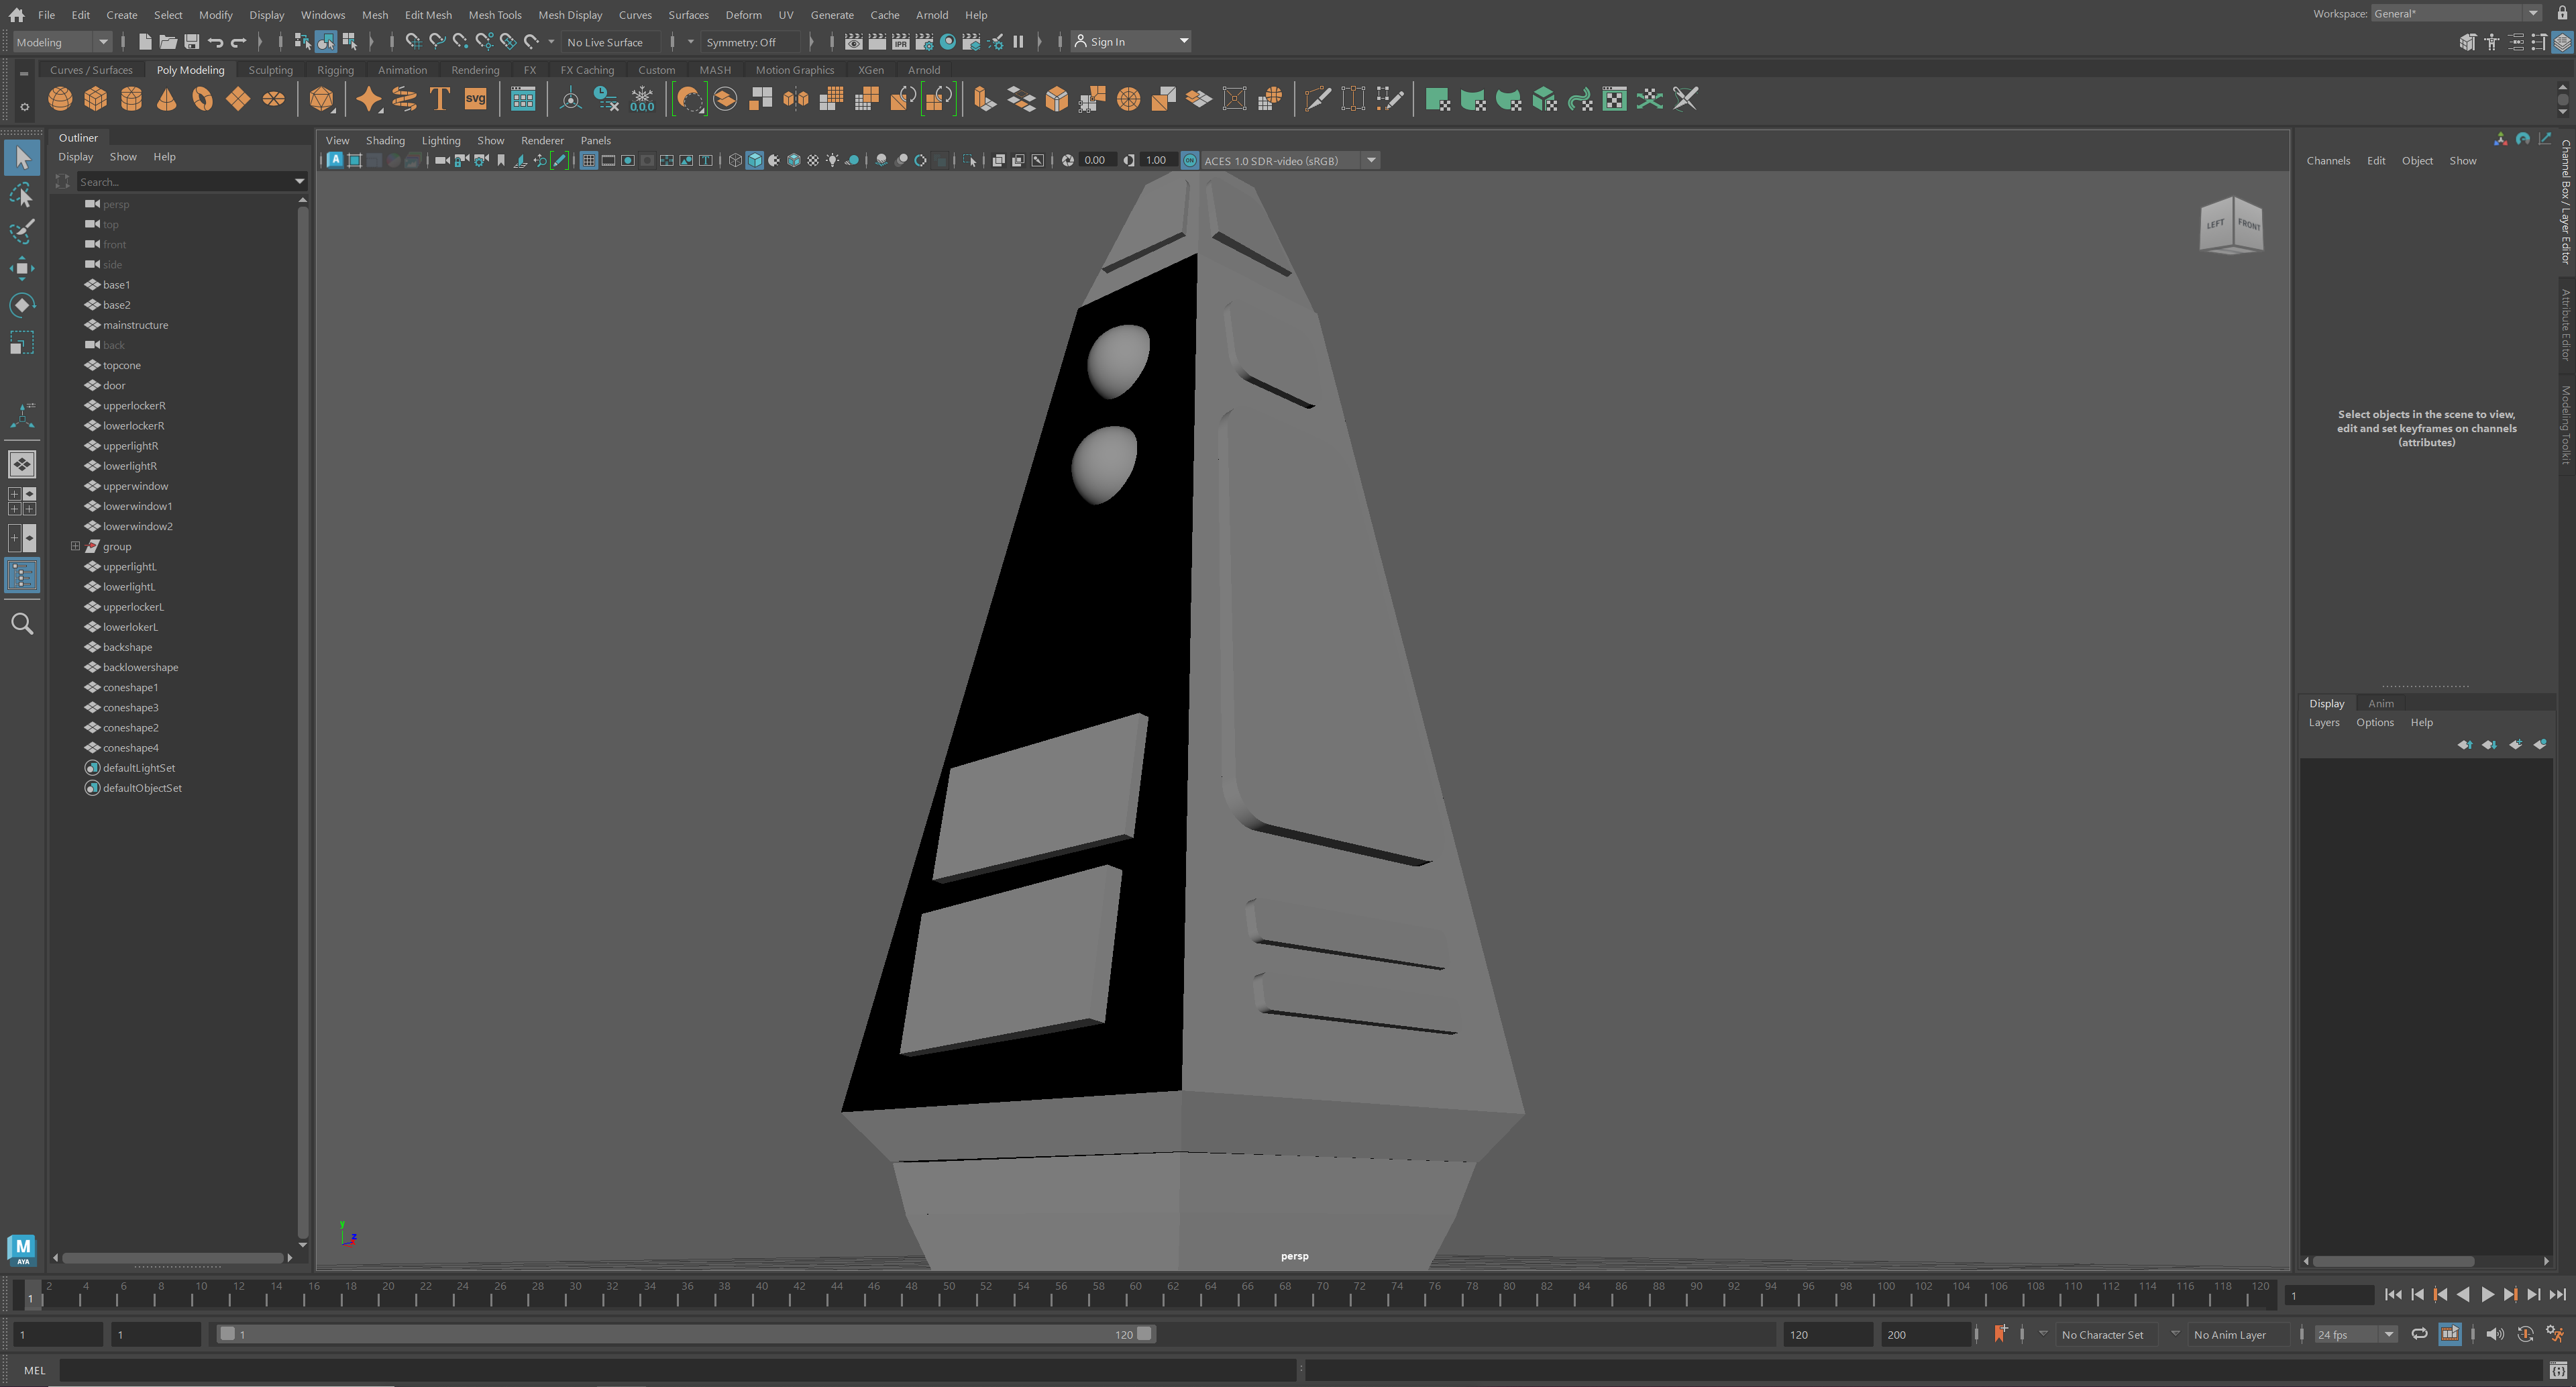
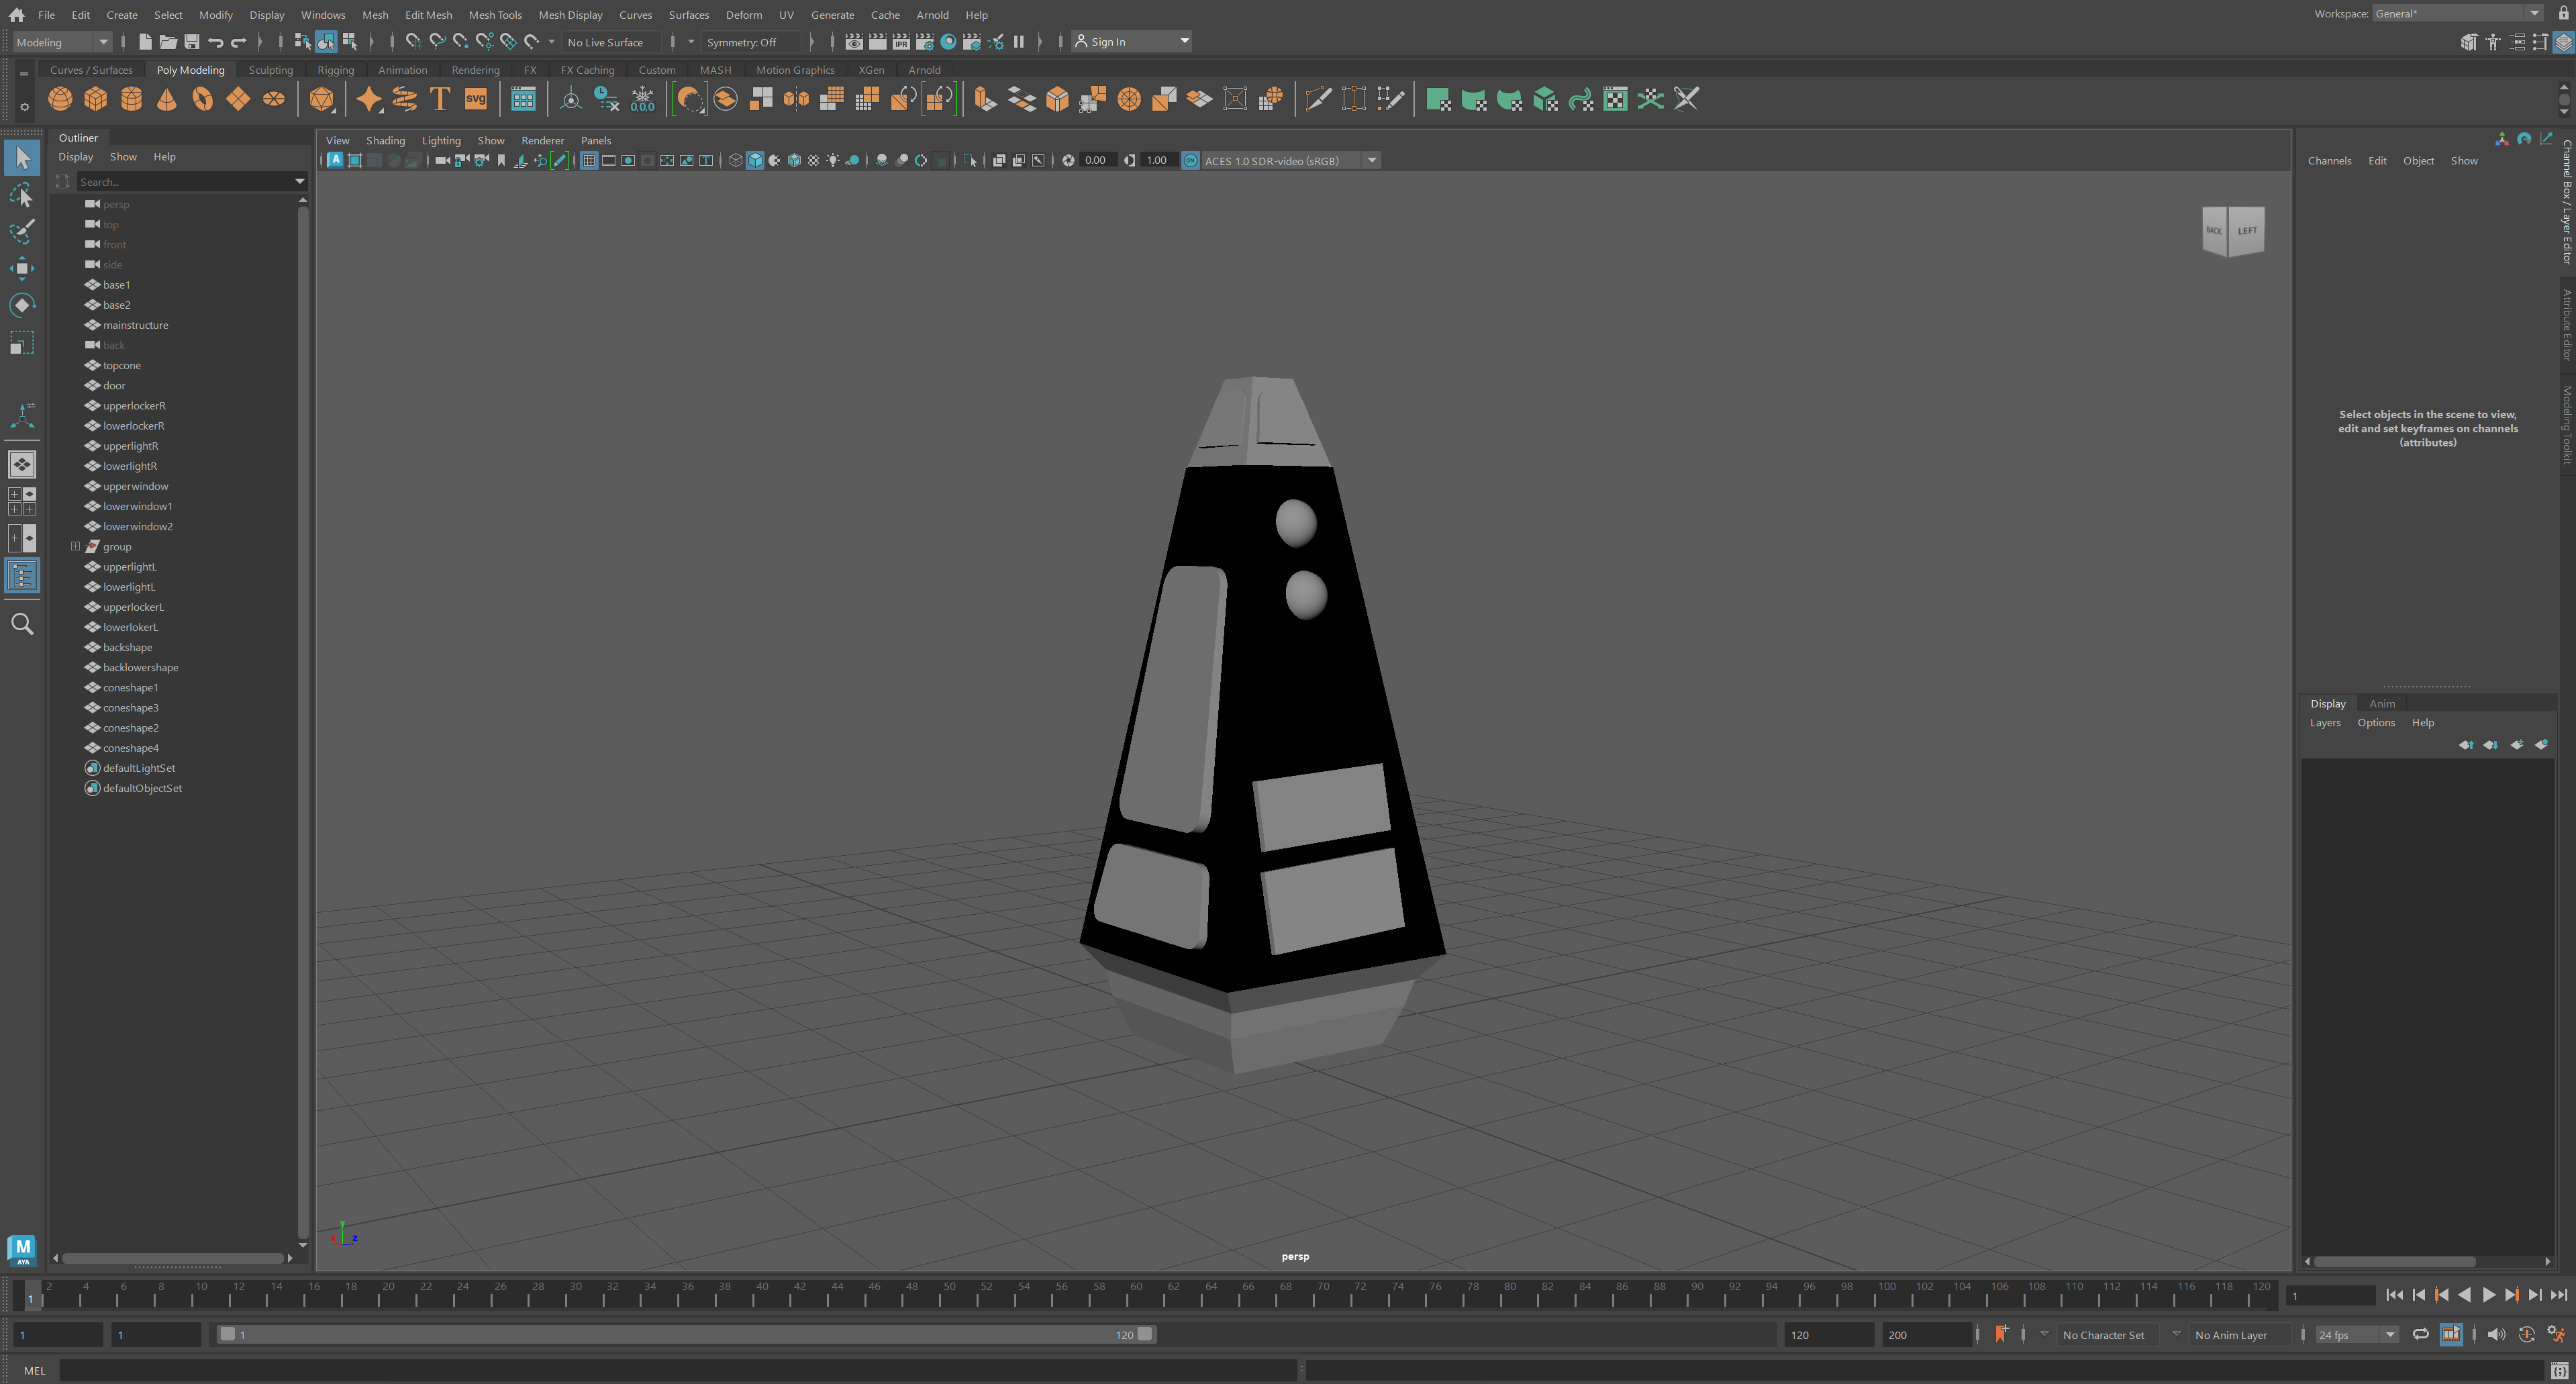
Final 3-Dimension Modelling Images
Below you can see a handful of images that explore the final modelling process created in Autodesk Maya.
References
artstation.com, n.d. ArtStation – Explore. [Online]
Available at: https://www.pinterest.co.uk/pin/429249408213294215/
[Accessed 19 April 2023].
artstation.com, n.d. ArtStation – Explore. [Online]
Available at: https://www.pinterest.jp/pin/448108231662757380/
[Accessed 22 April 2023].
en.wikipedia.org, n.d. Escape crew capsule. [Online]
Available at: https://en.wikipedia.org/wiki/Escape_crew_capsule
[Accessed 19 April 2023].