Our initial task was to experiment with Elementor and discover key tools and settings that will influence our blogs and future portfolio piece. Elementor is a plugin that works with WordPress allowing a user to customise and build creative websites to their personal styles. For this instance, we are using elementor at multiple points during each module so we need to make sure we are knowledgeable about the plugin.
The first experiment was with site settings which allows the whole site to conform to whatever we change these to and add it to all of our future posts. I wanted to familiarise myself with these options so I can alter the colours and typography elements when it comes to my final campaign. I used Adobe Colour to explore a pink colour palette and then transferred the Hex Codes into the elementor options. These settings automatically updated when I alter other sections in the site.

Figure 1 – The colour palette chosen from Adobe Colour to experiment with which links to my final portfolio project campaign about period poverty. 
Figure 2 – A screenshot showing the changed site settings in the elementor plugin which demonstrates the above colour palette.

The next step was to alter the same site settings but with the font choices. We initially went into Google Fonts to browse all of the available fonts we could use for our site. I decided to pick 4 fonts that relate somewhat to the ones chosen for my campaign mood board which you will see below. The same process repeated by changing the settings so that these fonts can be updated throughout the entire plugin. These are extremely useful if you have multiple posts that need to conform to the same design styles.


The next experiment we created was learning how to use the Image widget. This was very simple and had numerous different size options which allows us to change from thumbnail size to large. The link setting aligns with the WordPress one so we can link the image to media file which means the viewer can click to enlarge the image when previewing. I was surprised with how detailed these settings were compared to the original WordPress ones.

After we had covered the basic and obvious settings, we moved onto the more unique and customisable ones. These allow us to make our site our own and the layout can severely change. We have 2 different widgets we have used below which include the icons and the shape divider tool when editing a whole section. As you can see these conform to the global colours we originally set. I included two of the icons from the library that was readily available and added them into a 2 column grid section. The shape divider also had many different library shapes available and in the example below I used the clouds one. The settings involved in this widget were quite overwhelming in conflict to the size and shape on the divider. I managed to control the colours and shape to how I wanted it to look and was happy with the final outcome.

Figure 5 – A screenshot exploring two vital widgets in the elementor editor which include the icons and the shape divider. These conform to the global settings we originally changed which demonstrates a successful experiment. 
Figure 6 – A screenshot from the shape divider widget settings which explores the resizing options and the different type/colour of the divider.

The next widget I wanted to experiment with was the image carousel as this would be a good tool to have when creating a campaign site. I also have not yet found a simple way to create one apart from using the software Adobe XD so it makes the design process more time efficient and simpler. I only added in three previous blog post images but you could add as many as you wanted to. The settings for this widget was extreme; to the point where you can even control what icons you use for the image scroll. This tool was extremely easy to use and will be useful in future projects.

Figure 7 – A screenshot of the image carousel in use and once again conforming to the global site settings I previously produced. 
Figure 8 – The settings for the image carousel widget and how these can make even the smallest options unique to your site. This tool will be crucial when creating a campaign site.


Progress bars are key interactive icons which allow your viewers to get involved and contribute to the achievement. Once again, all the assets included link back to the overall settings which are a great way to make sure all your creative elements align with the brief. I find that interactive elements work well with a range of different audiences, especially viewers who are completer’s and aim for things to be achieved. The settings for this widget are small but can allow you to completely change the look if you require it to stand out and grab the audience’s attention. One thing I would like to see be added in to this feature is an outside source that can update the bar automatically and not have to edit it manually every time.

The final widget I am going to experiment with is the social icons. This is a very basic feature which allows your viewers to access any external social media platforms at the click of a button. This tool is seen on numerous sites that want to explore multi-channel marketing and spread their message throughout different platforms. I will definitely be including this in my campaign project as its essential to emphasise the message across the digital globe.


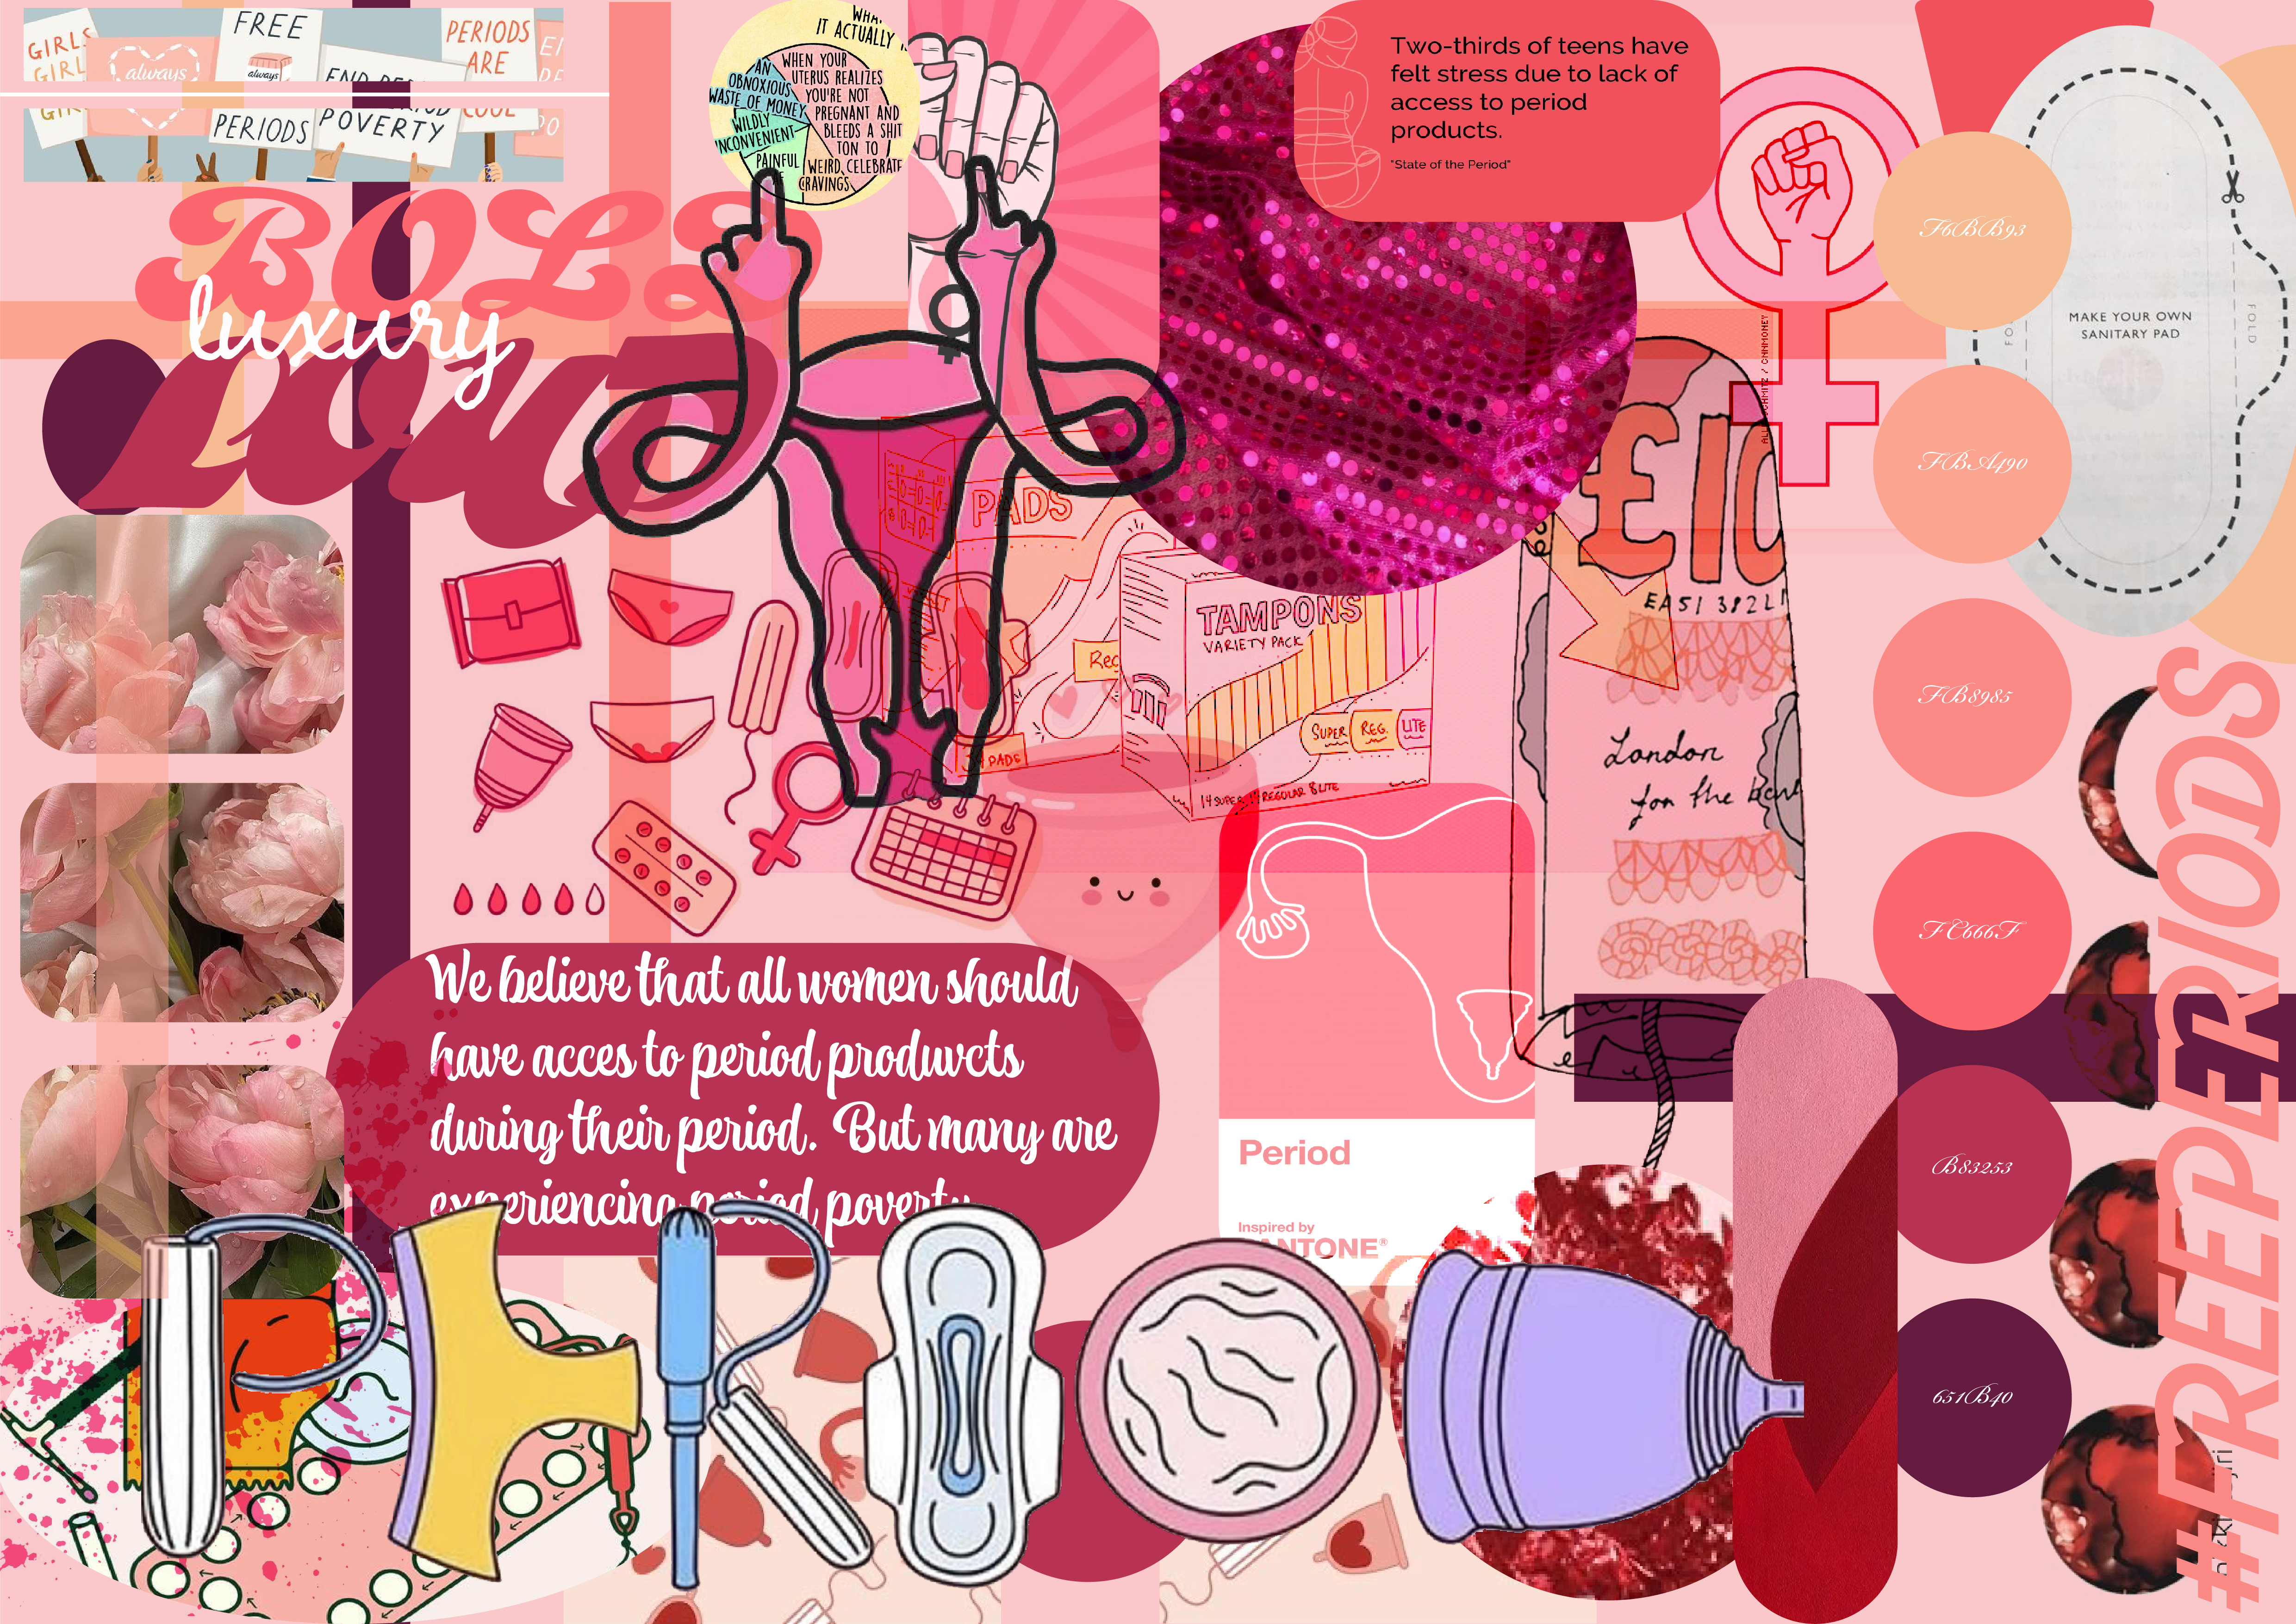
The next exercise was to create a mood board that expresses different ideas for our final portfolio site and to include some creative elements that will be added to our composition. We were given a few elements that were crucial to include but the rest of the board was free to explore what design choices we want to finalise with. The important part of this mood board was coming up with our colour palette and typography that we are going to use throughout the project. Due to the fact that I already knew my campaign was going to be based on period poverty, I wanted to explore this in my elementor settings above. This solidified what I was going to include on my mood board and I just had to create it now.
I used Adobe Illustrator to create the final mood board and my images primarily were imported from Pinterest.